Check out the final stages of the build after the jump
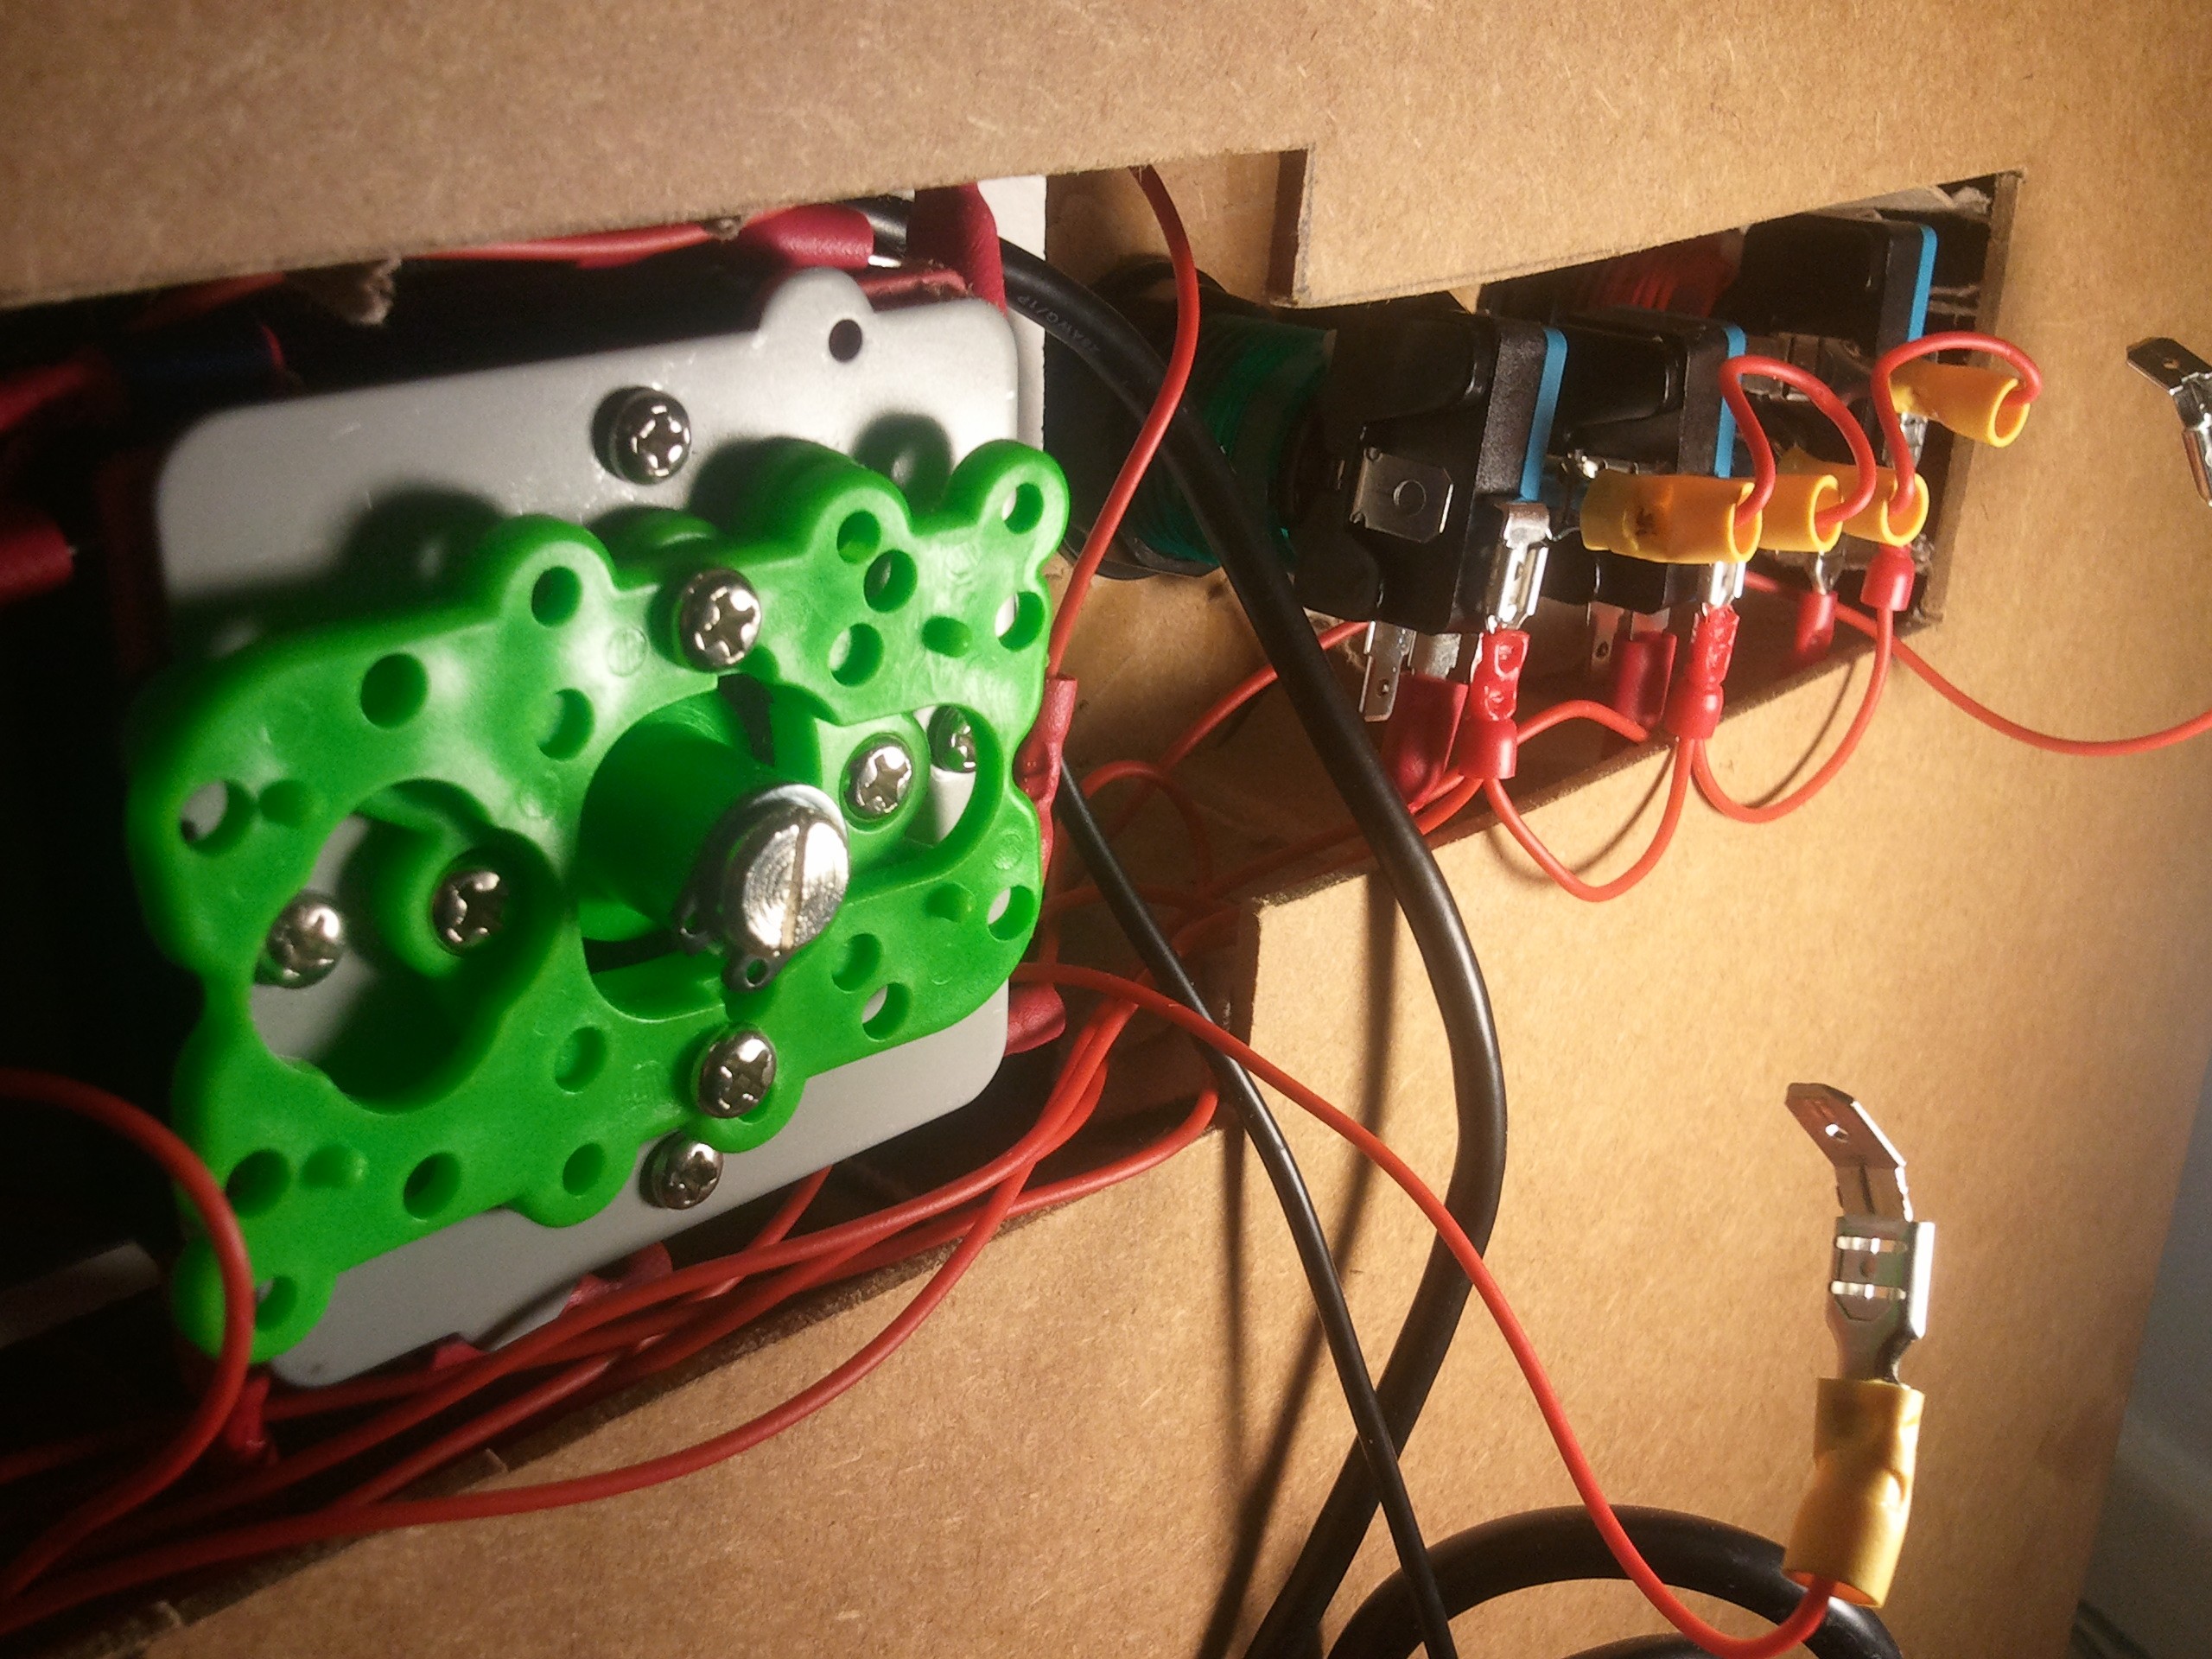
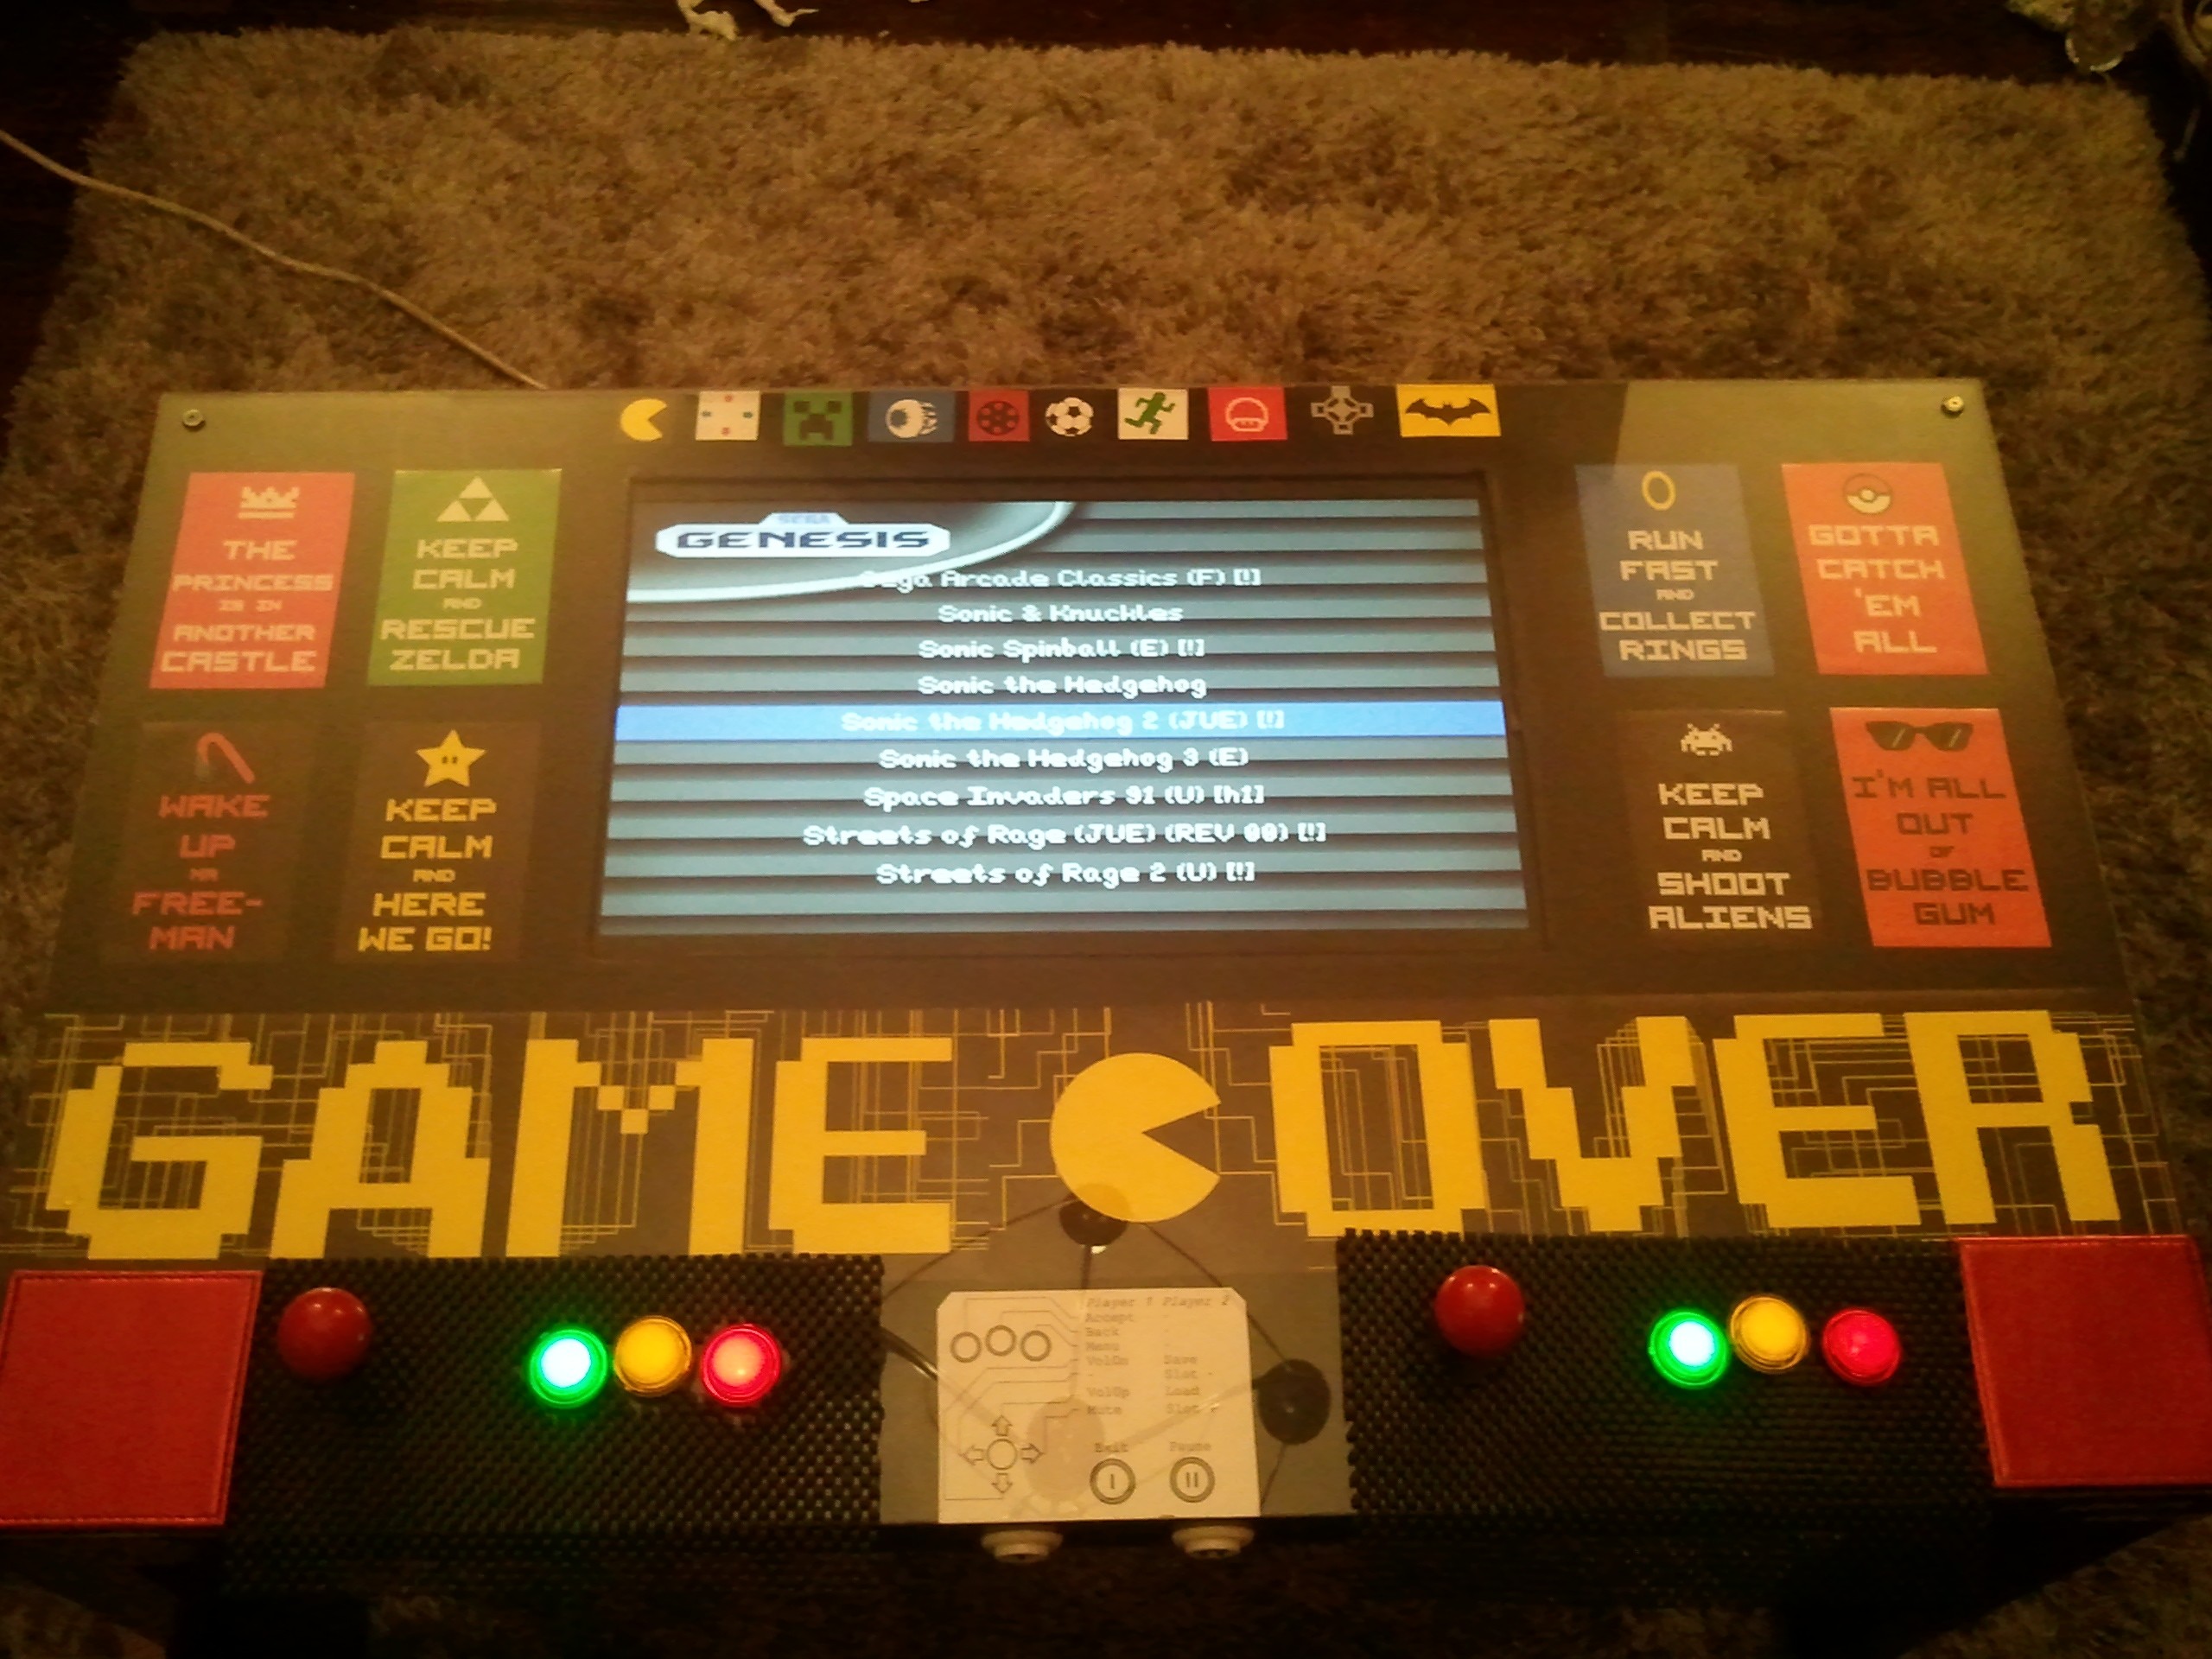
The joysticks and buttons are now all wired up, using about 10m of cable and a load of 4.8mm spade connectors.
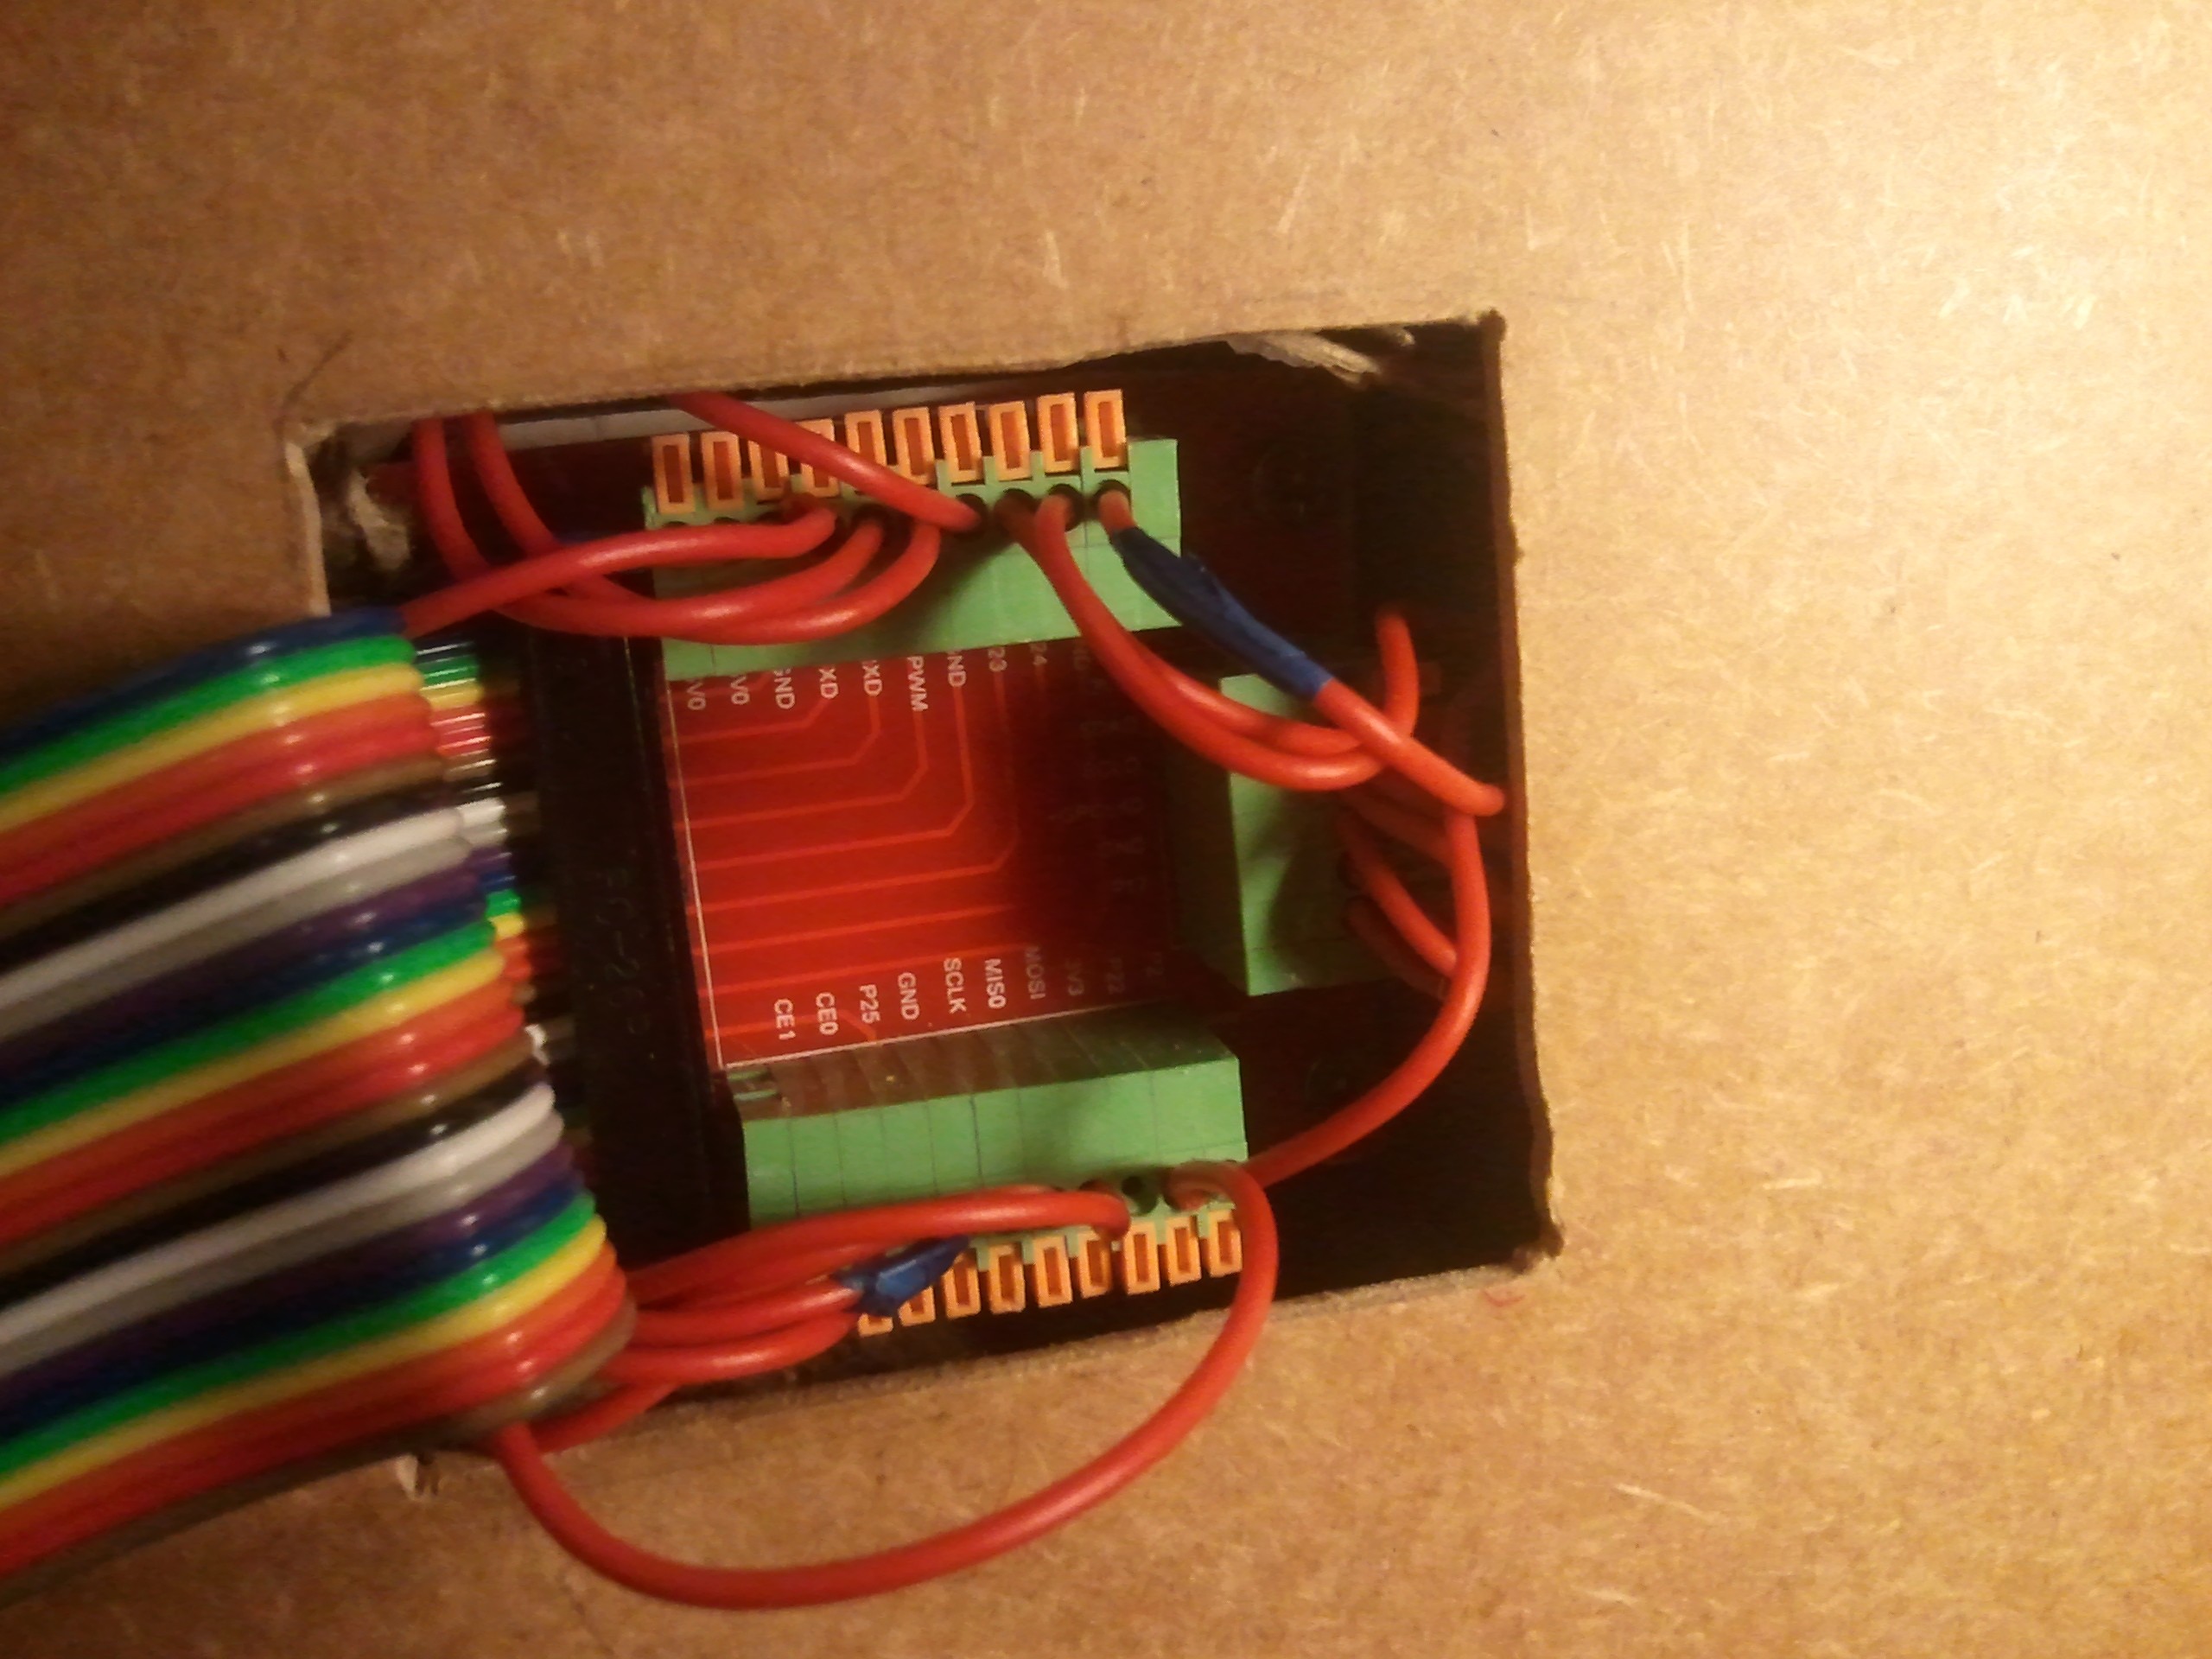
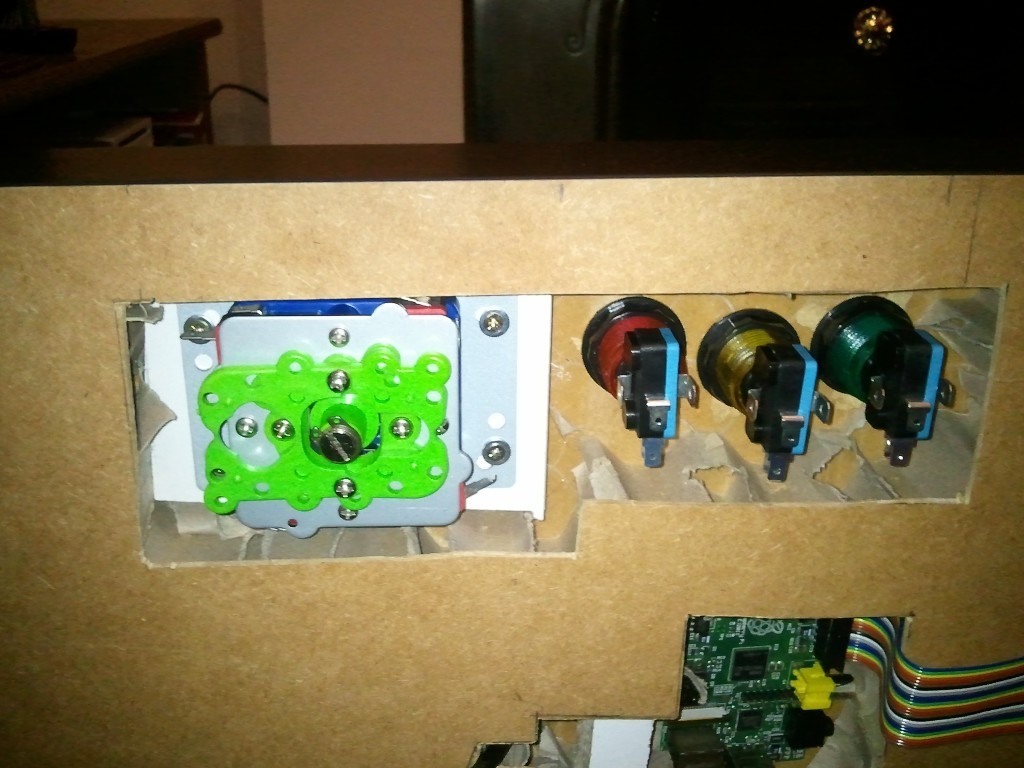
All the cables lead into the GPIO board, there are a total of 5 Ground lines (P1 Joystick, P2 Joystick, P1 Buttons, P2 Buttons, Start/Select/Coin In Buttons) and the switch simply connects each output to the ground.
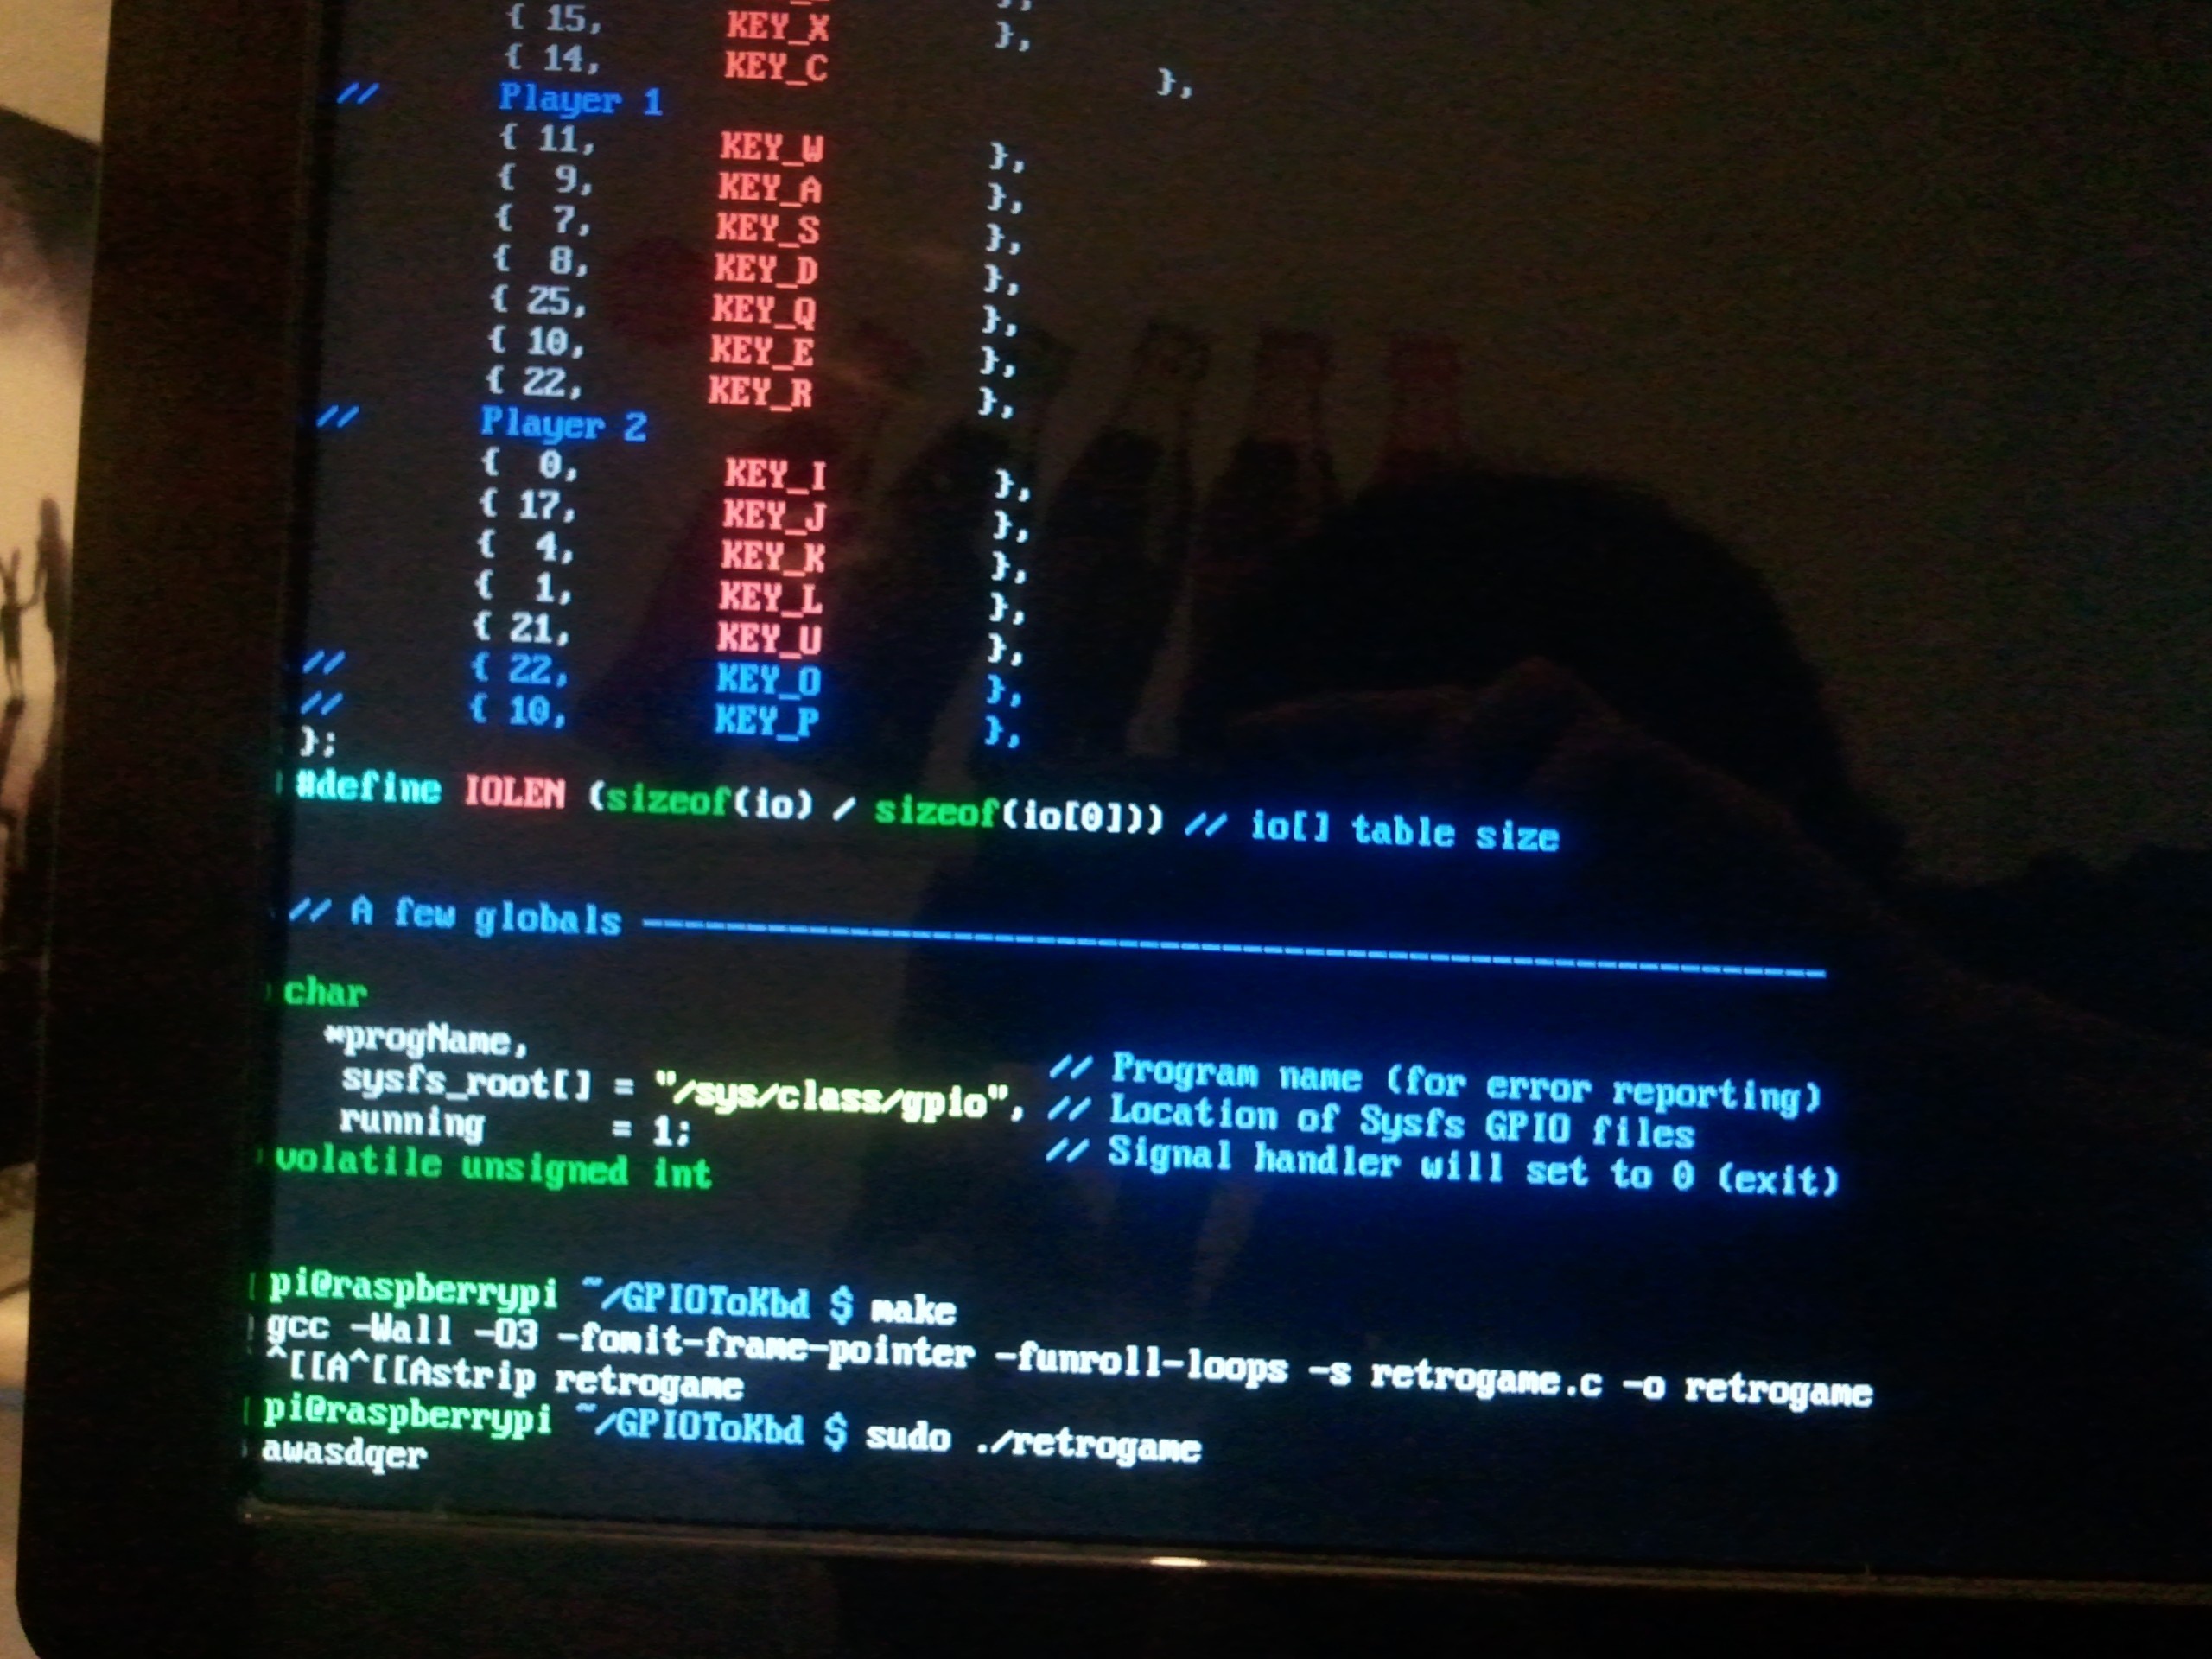
A script provided by Adafruit (RetroGame), scans the raspberrys GPIO pins and converts them into virtual keyboard presses
The screen was made Dust Tight using electrical tape over both the table edges and the screen bezel, the electrical tape layers then creates a nice seal between each other
The perspex was then fitted ontop, using 4 screws and a dipped washer. Some posters found in a local supermarket were cut up and used to theme the table.
After owning my Raspberry PI for aR year, I decided it was time to actually do something useful with it.
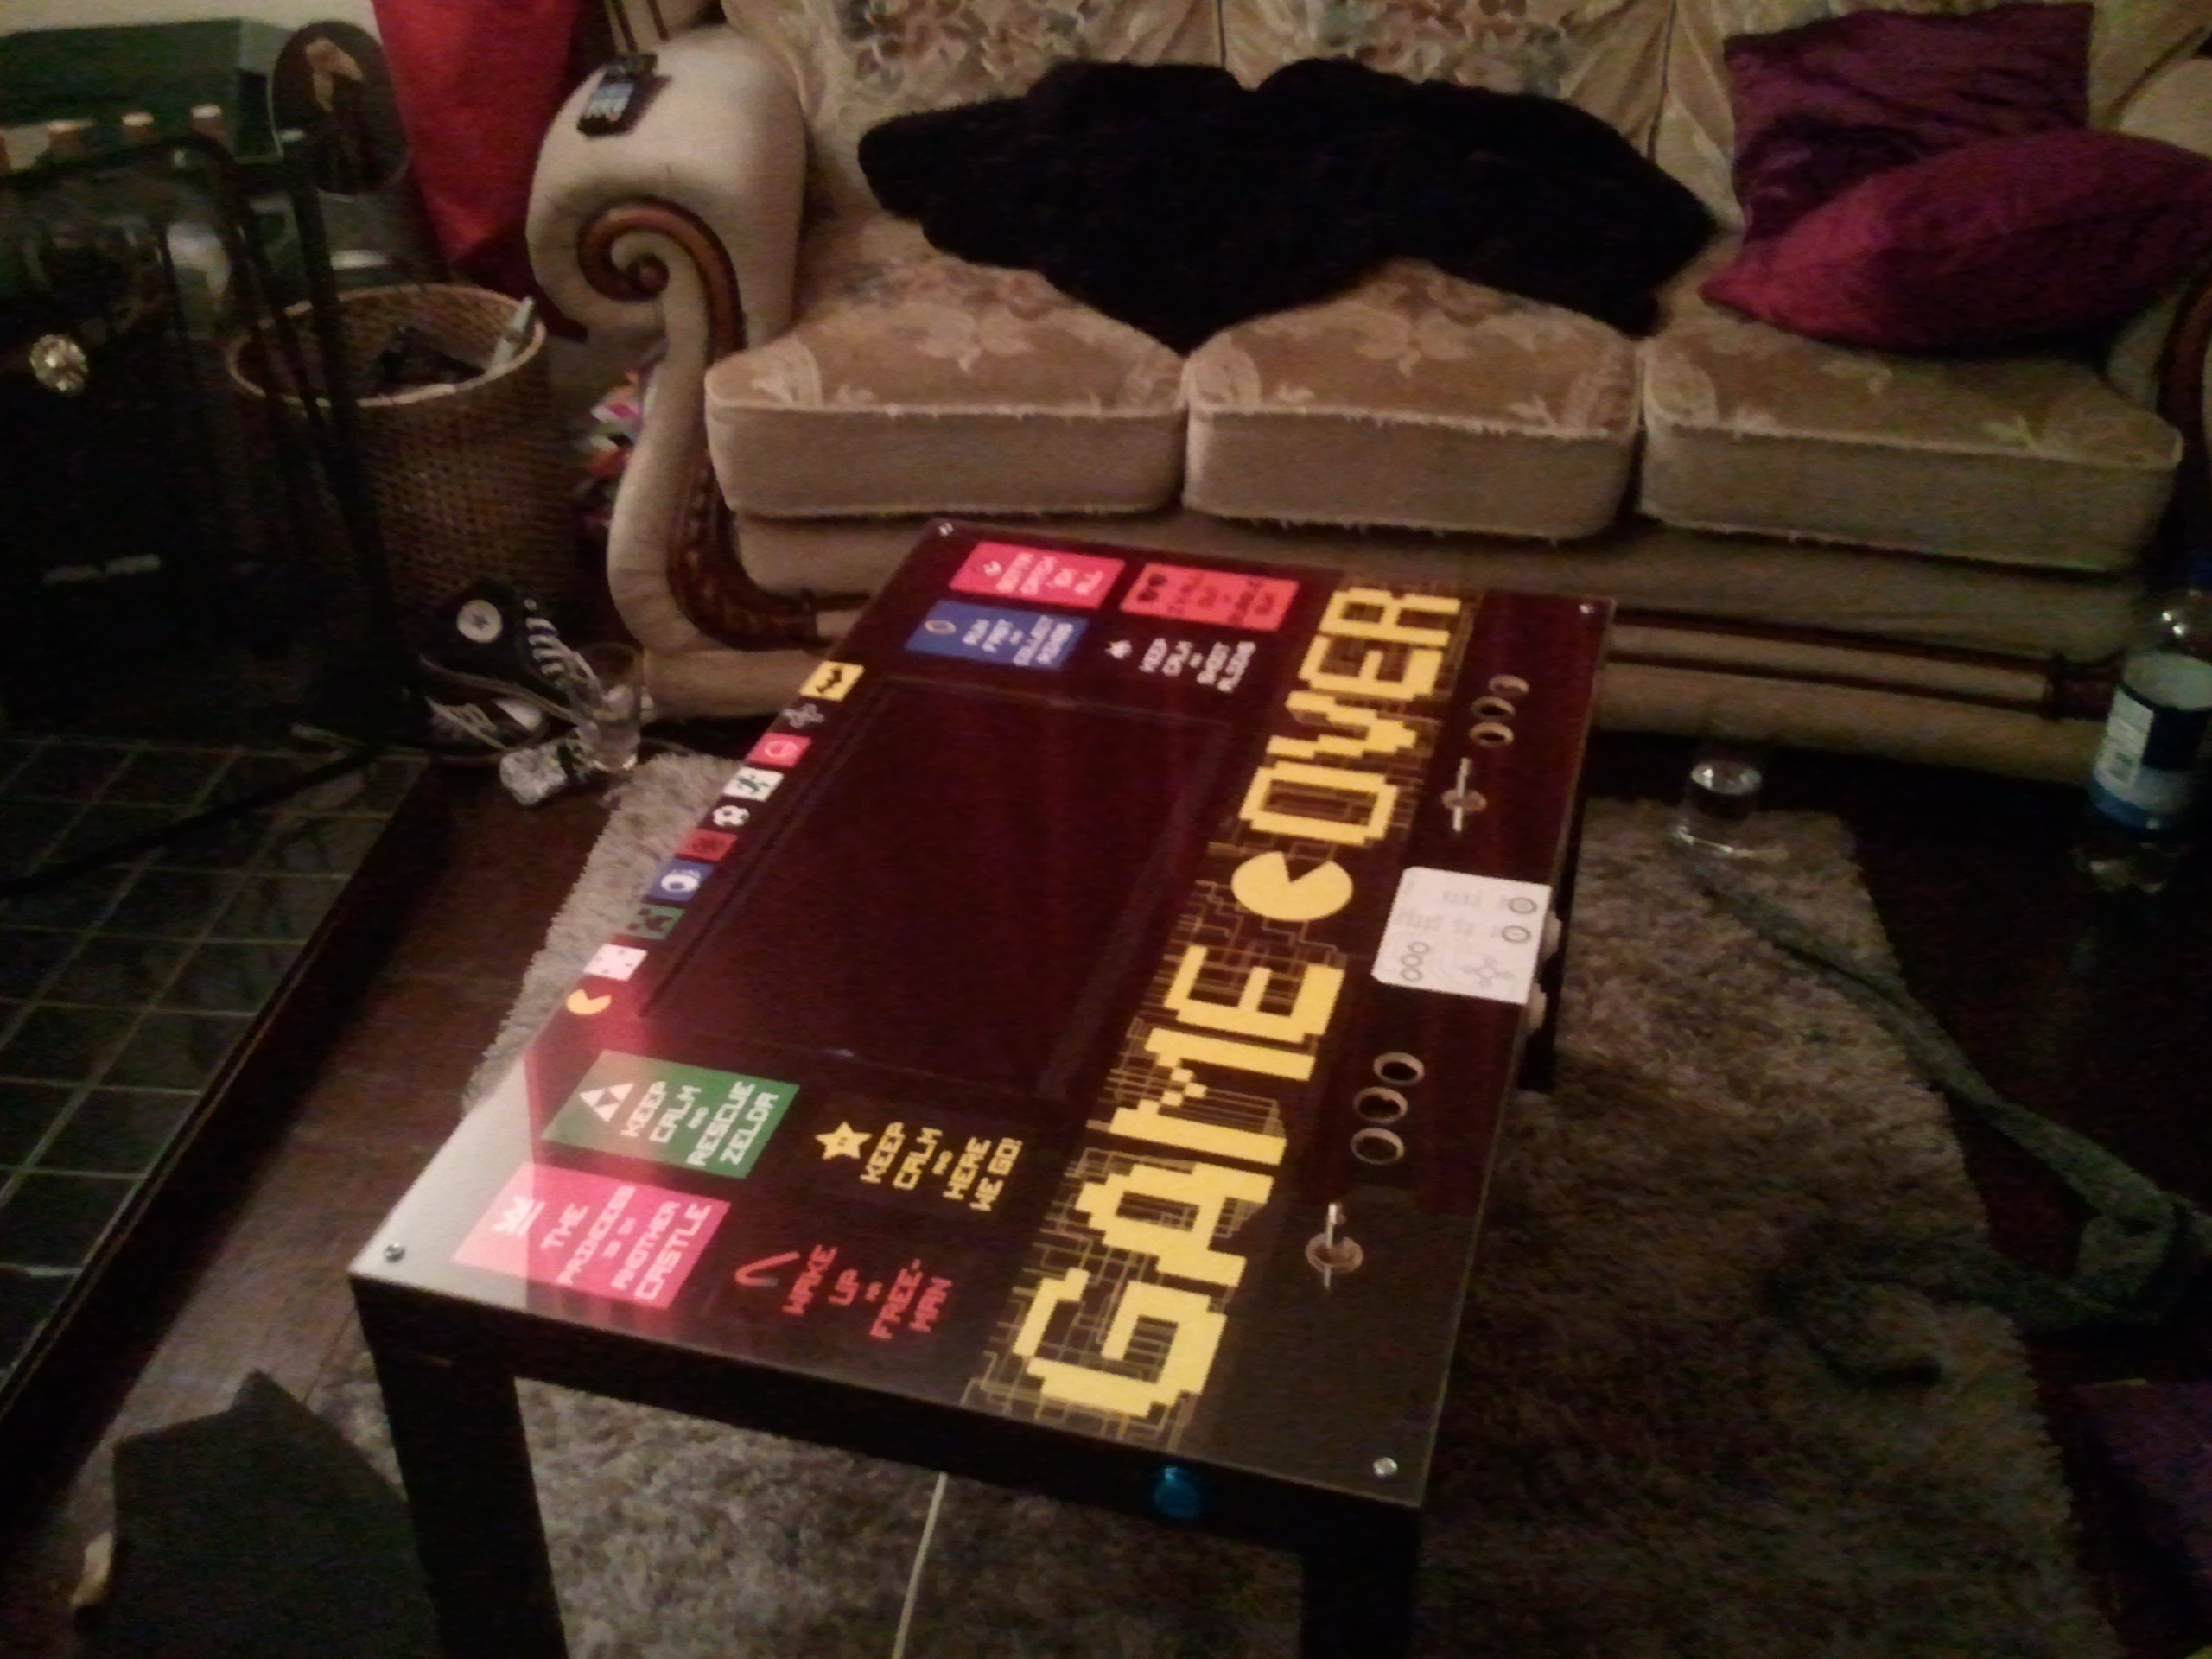
I"ve decided to ruin my girlfriends coffee table and convert it into a fully functioning arcade cabinet for entertaining guests.
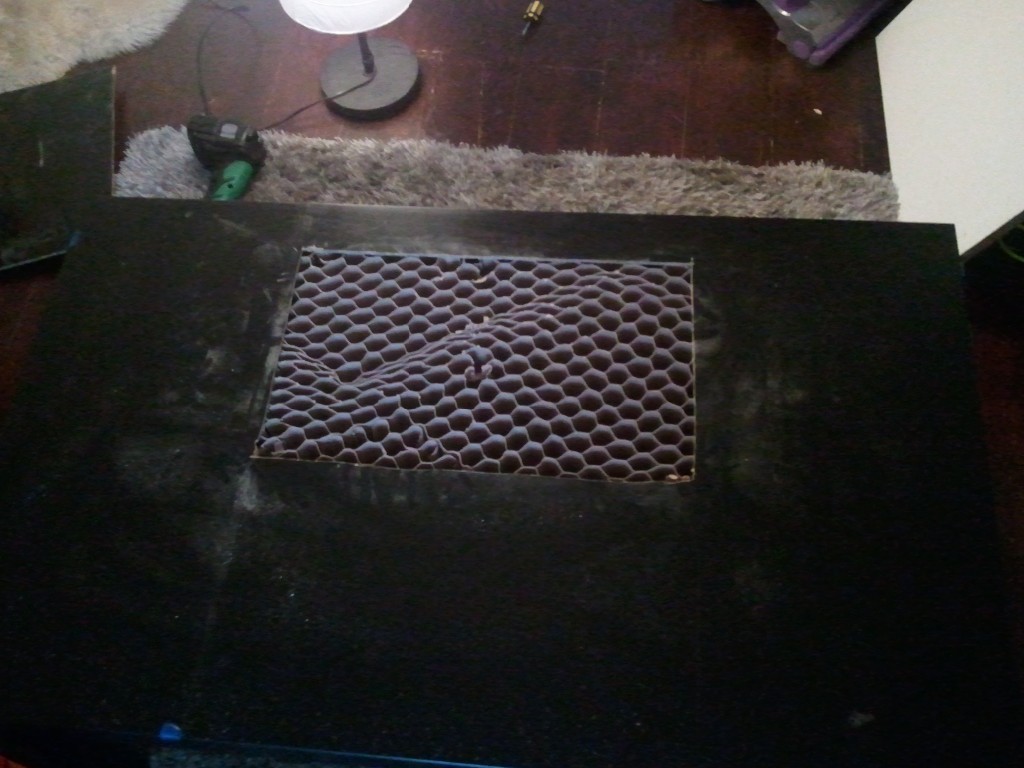
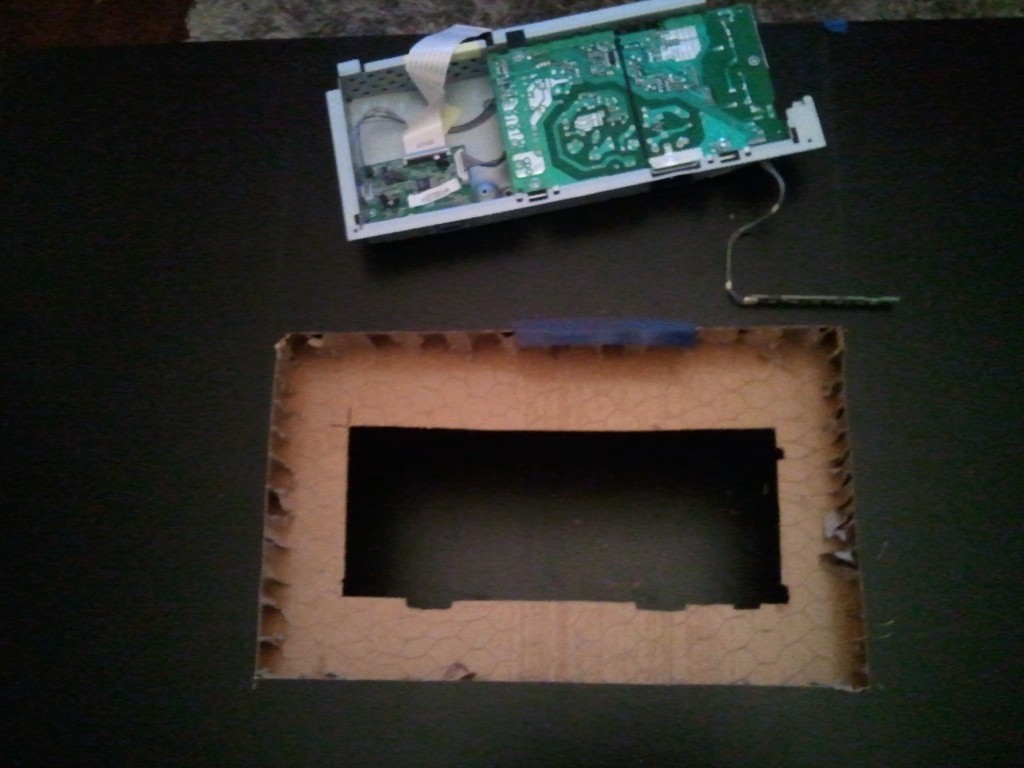
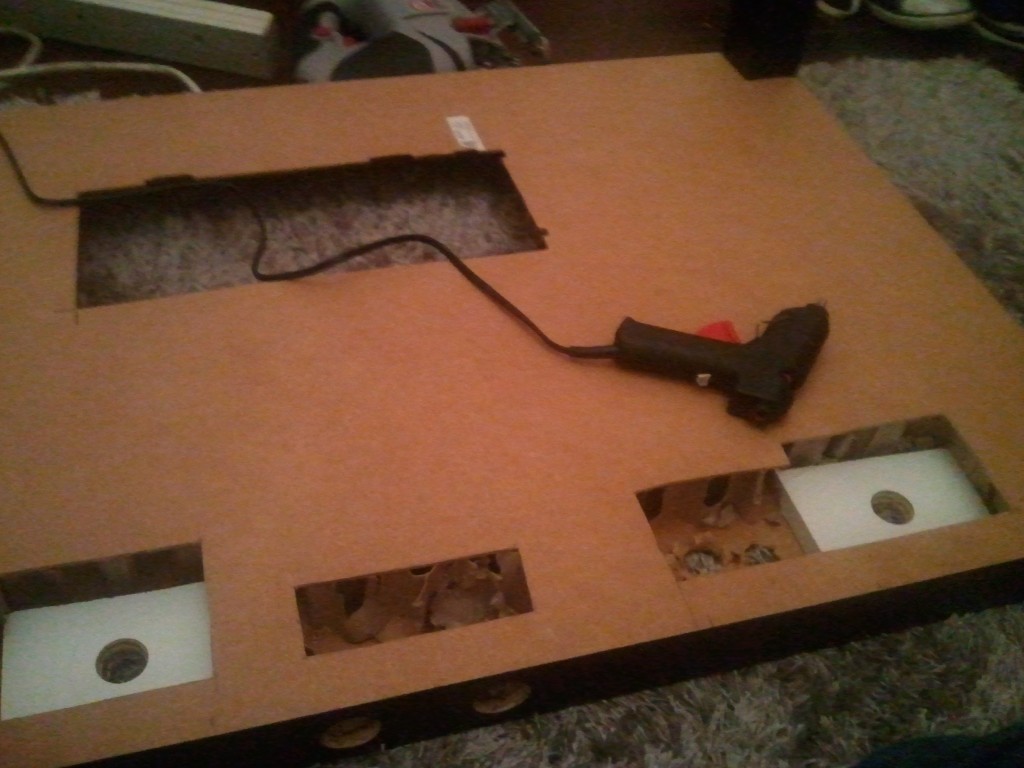
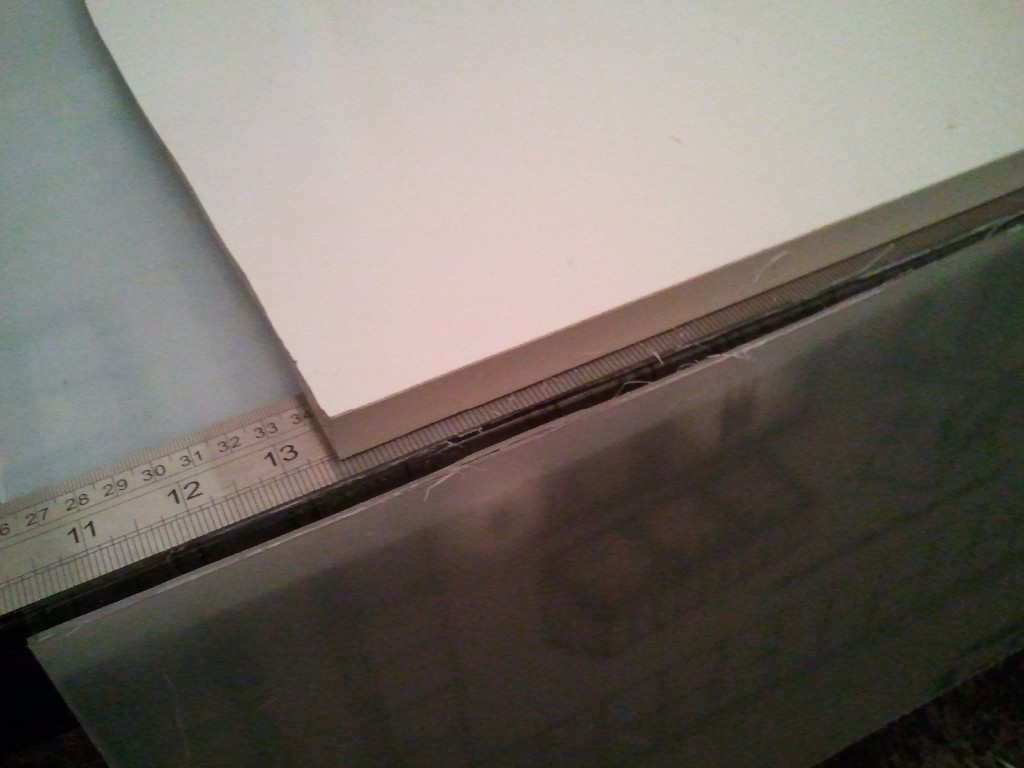
The Victim, the table is a £16 IKEA Lack table. its filled with cardboard making it very easy to work with. Here you can faintly see I"ve roughly drawn lines to cut out for the monitor. Shockingly I did this with a 30cm ruler
Insert description
Very badly cut hole. The cardboard can just be pulled out using your hands
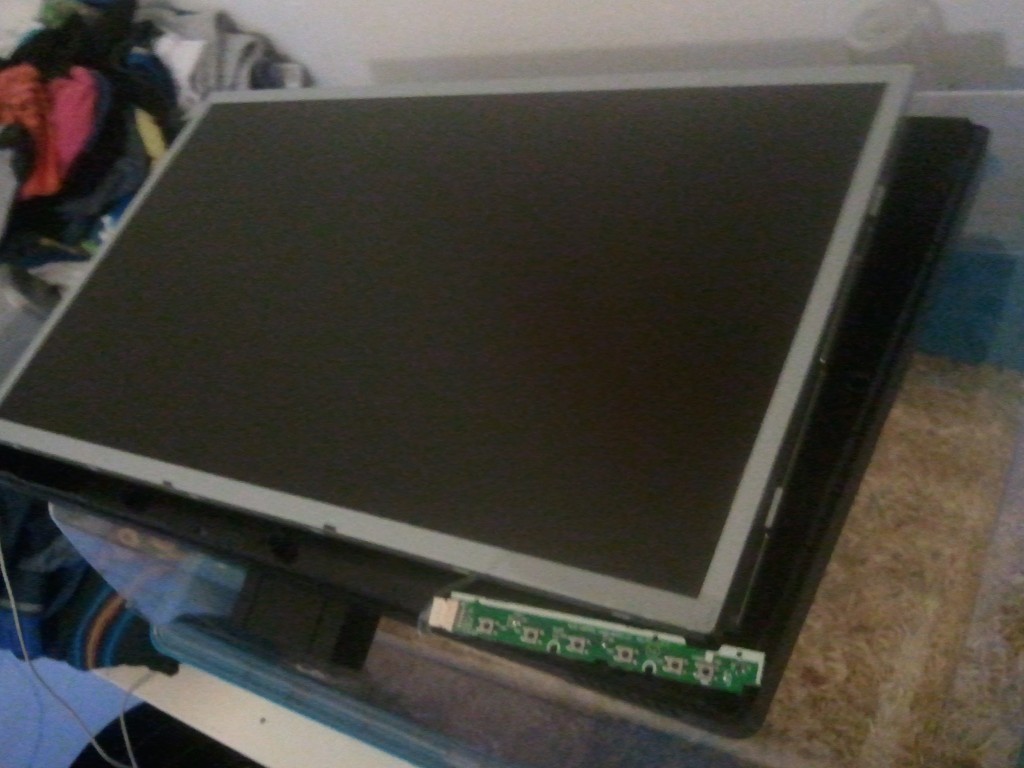
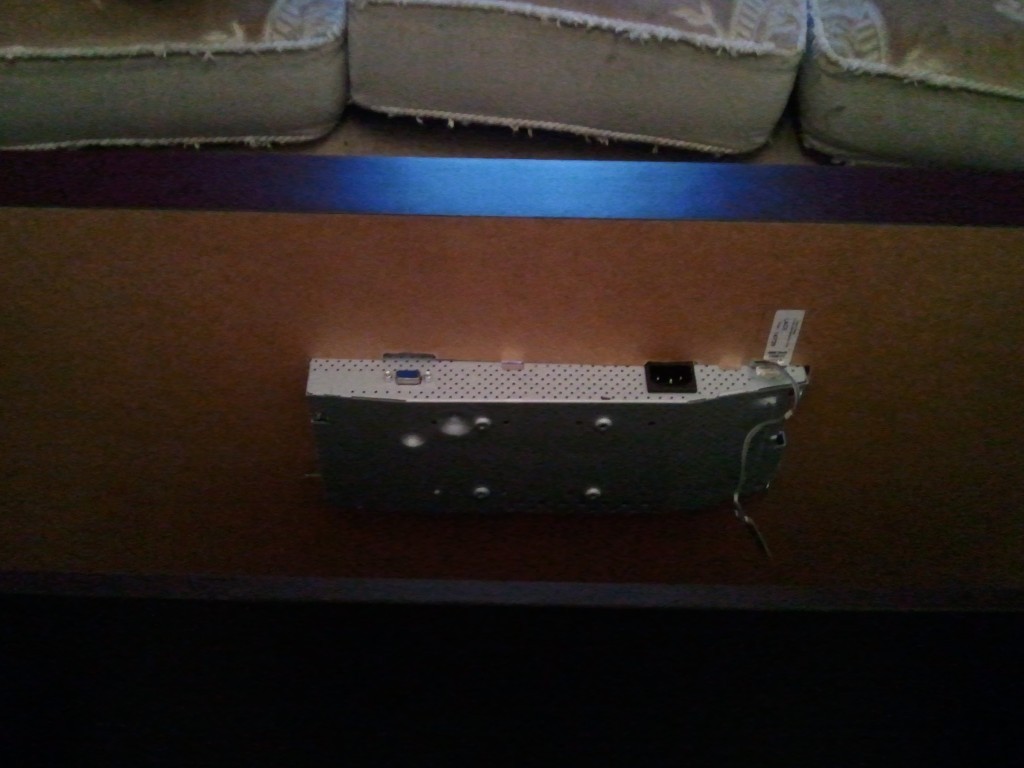
I scored a cheap monitor off Ebay, unfortunately it was VGA only, meaning It wasn"t so cheap after buying a HMDI to VGA adapter for the PI. The resolution is pretty poor, but for old arcade games it does not matter at all, in any case it should help speed the games up with having less pixels to render.
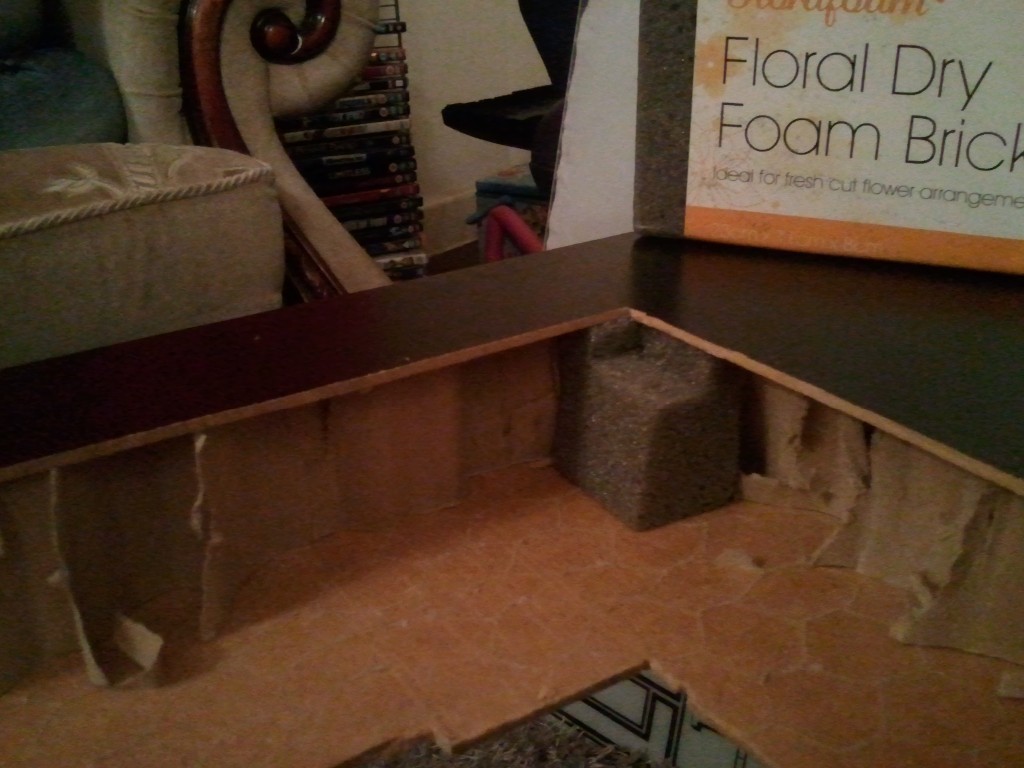
The monitor unfortunately had it"s transformer inbuilt, unlike newer monitors have a power brick (Should of done my research!). A hole had to be cut to hold this in place and allow air circulation.
Once in, it did not look too shabby, and allowed easy access to the vga port to plug in a laptop etc.
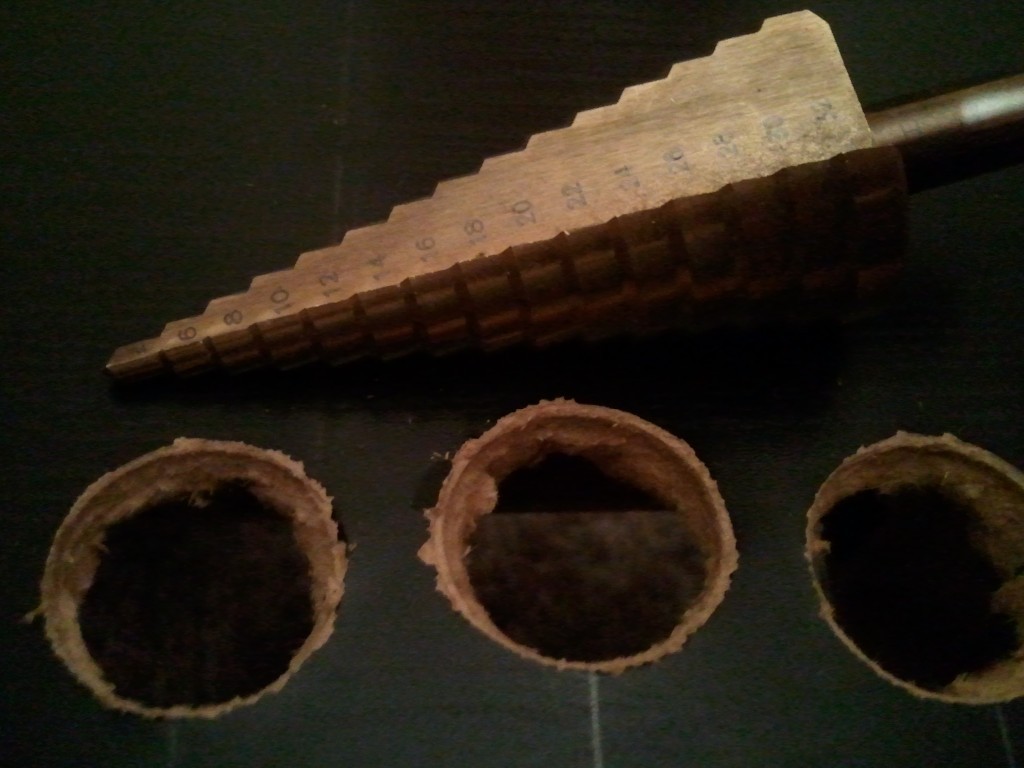
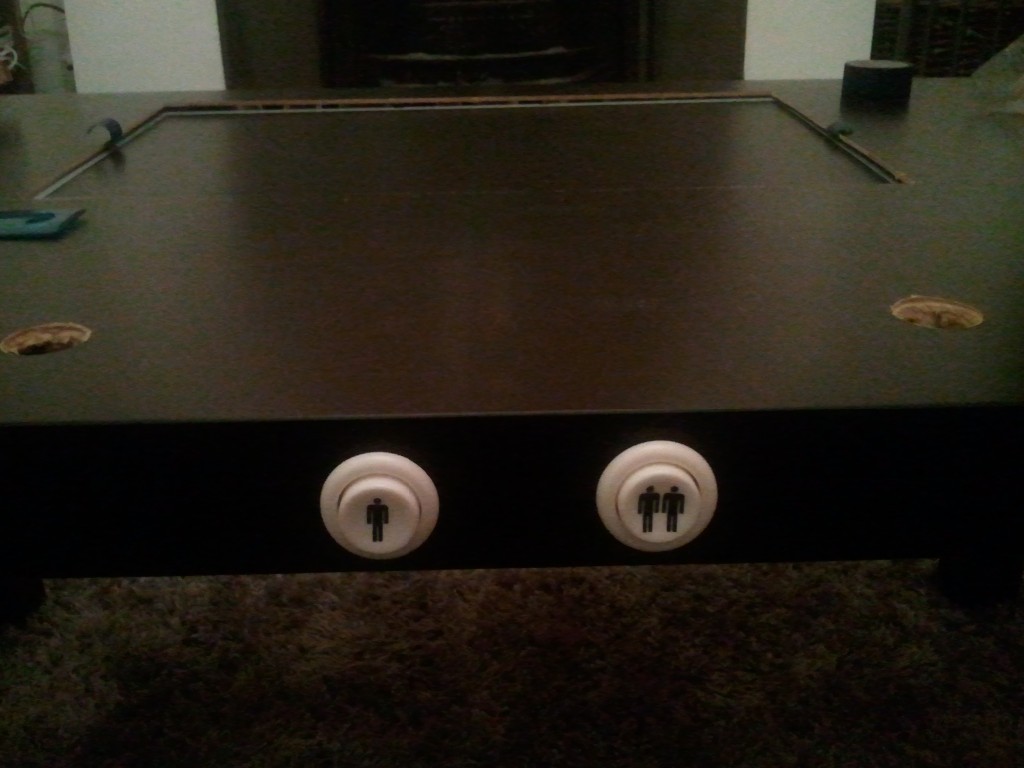
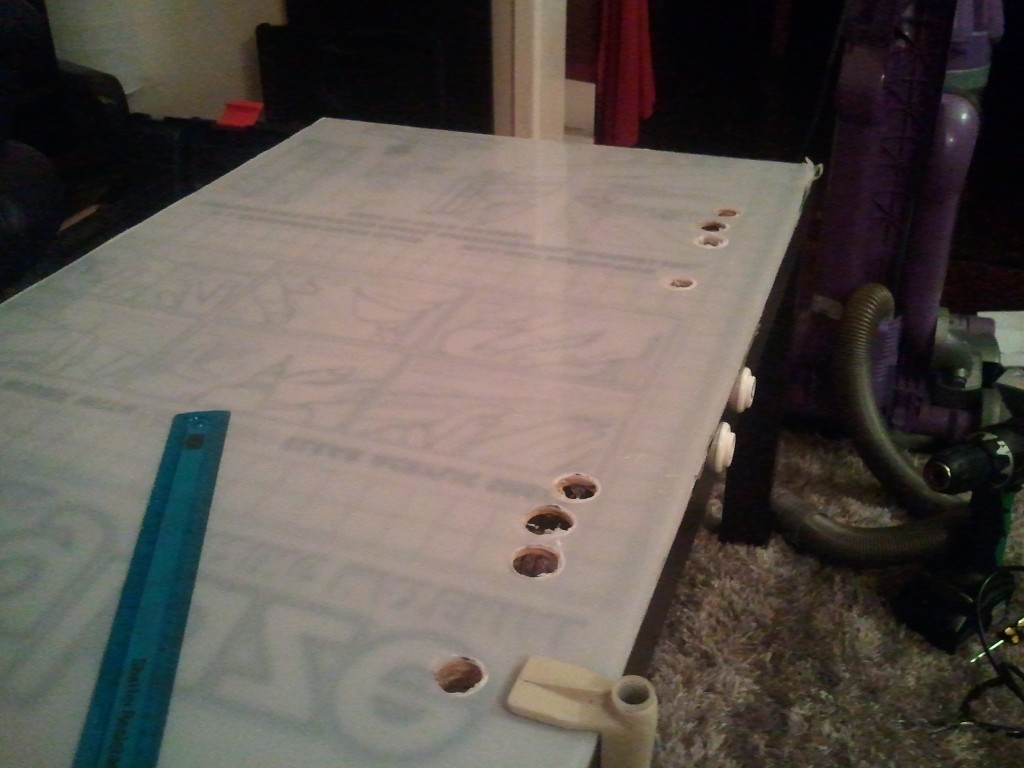
The next step was drilling the holes for the buttons, it was looking quite expensive for all the hole cutters I"d need, in the end I read up on people using a stepped drill bit, which worked out loads cheaper, and saved many headaches later on with the plexi glass. It"s finish isnt the smoothest, but the button caps hide that.
Some more holes were drilled for the player 1 & 2 start buttons,, and here I"m testing a wooden mount for the monitor.
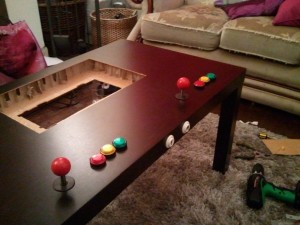
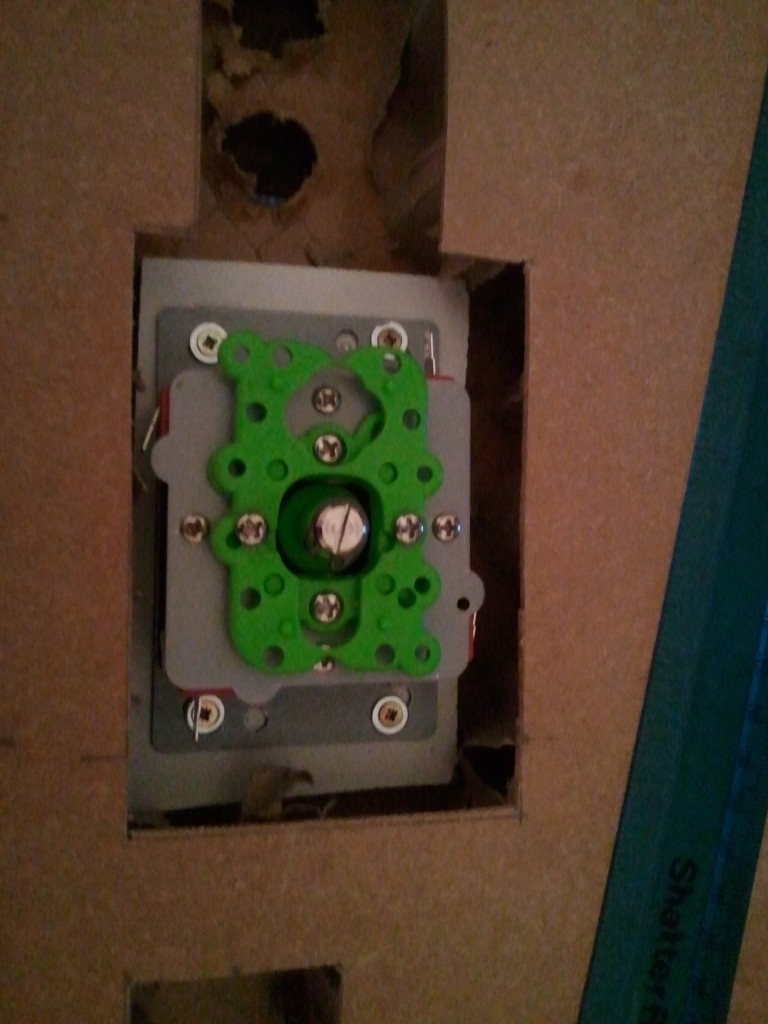
Next came the joysticks, I spent a long time looking up on how to mount them without any screw holes on the surface, in the end I opted to glue some wood to the underside of the table.
The joysticks then screw into the wood holding them in place.
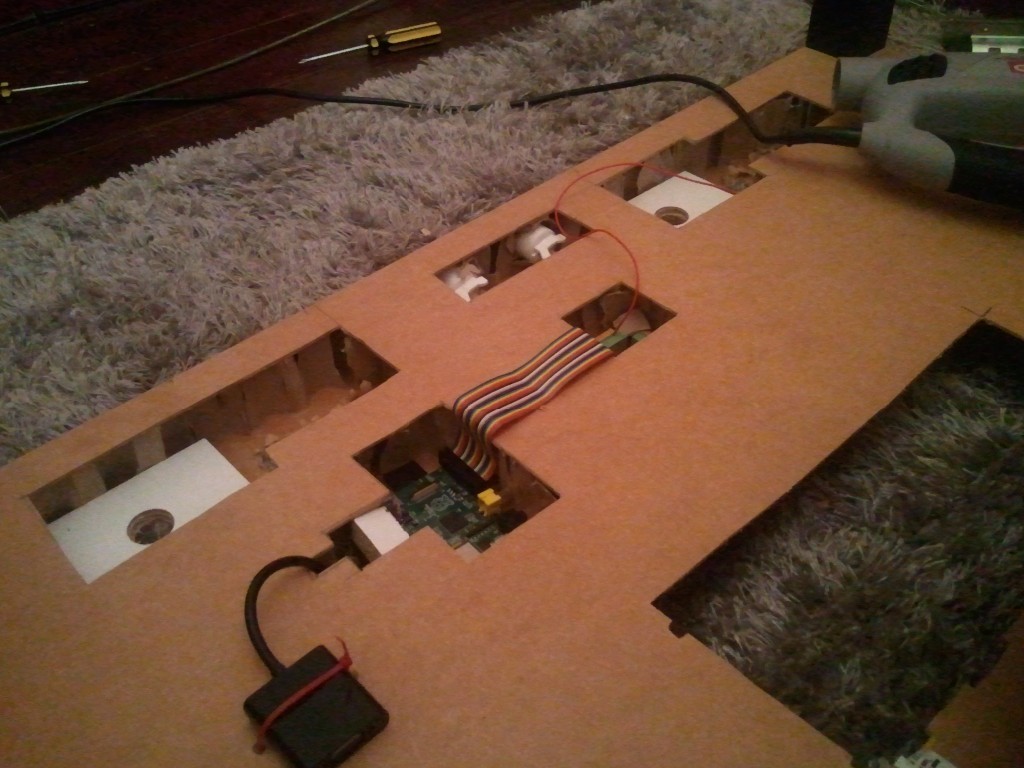
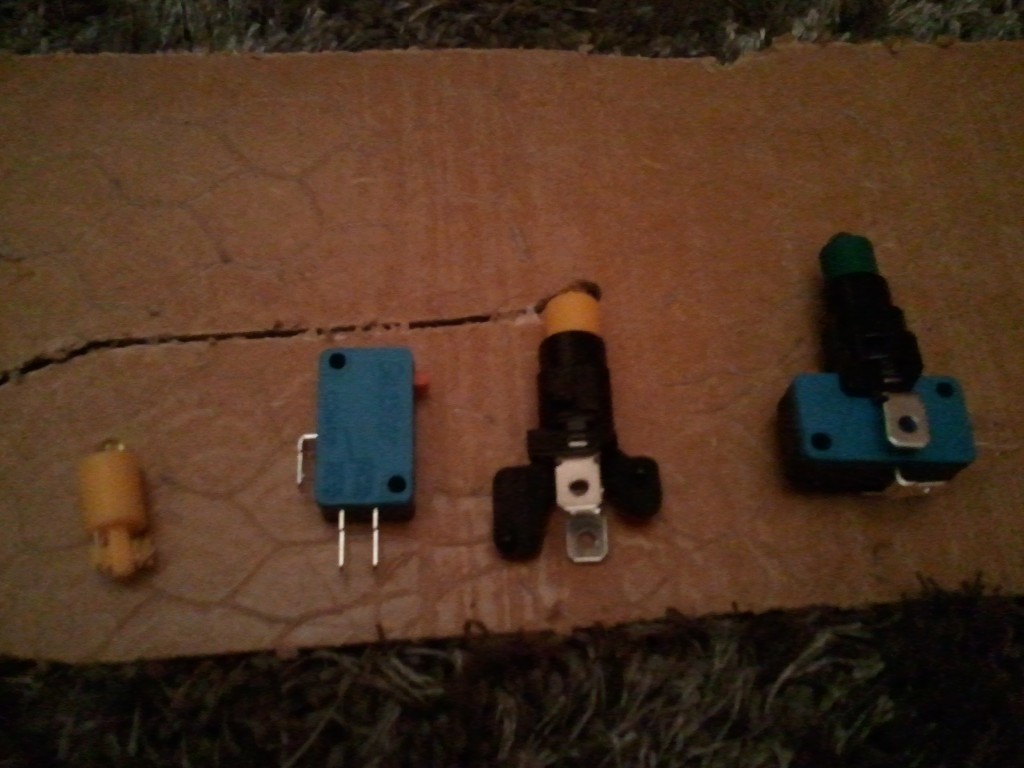
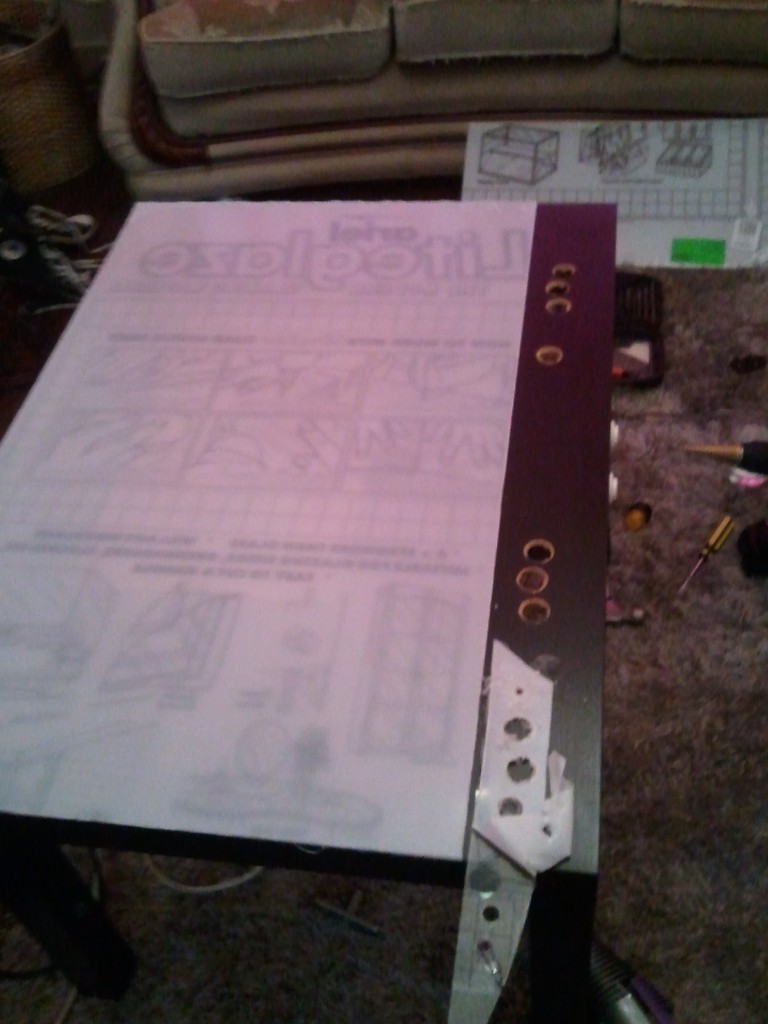
I found a GIPO extender in maplin, it handily allows you insert raw wire into the pins, all 14 buttons will run into this block, a simple script on the pi translates the GIPO signals to a keyboard key presses (
Laying out the Rasperry Pi, the VGA converter and the GIPO pin board
I brought some LED arcade buttons off ebay:
Joysticks and buttons assembled:
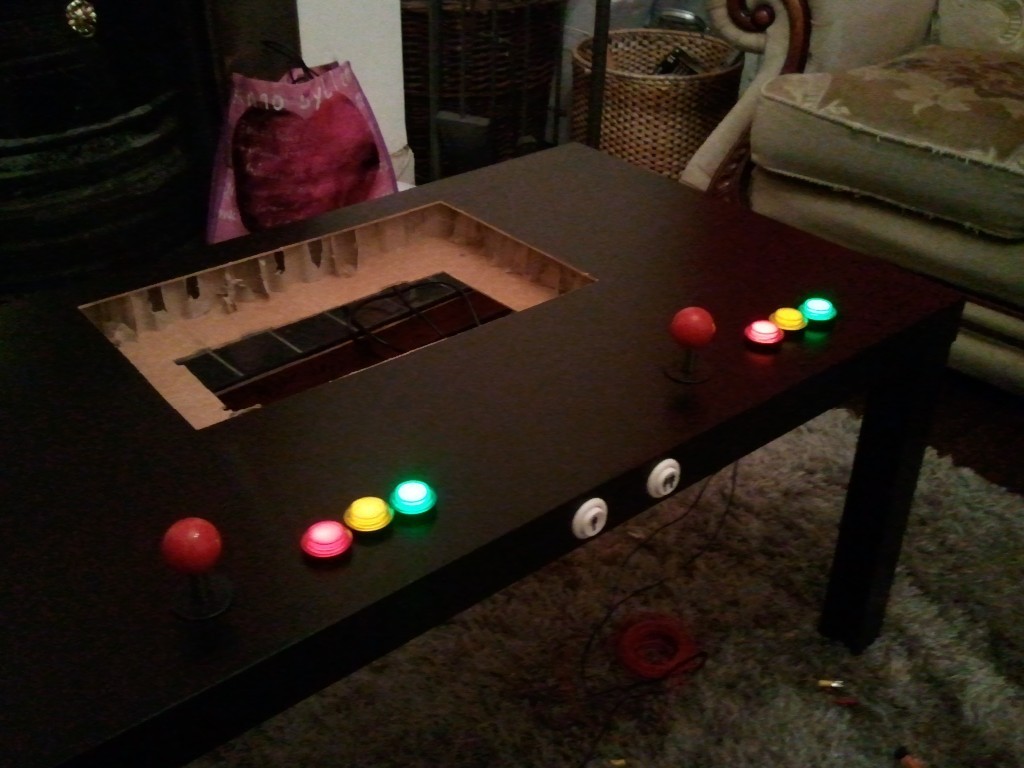
Top view:
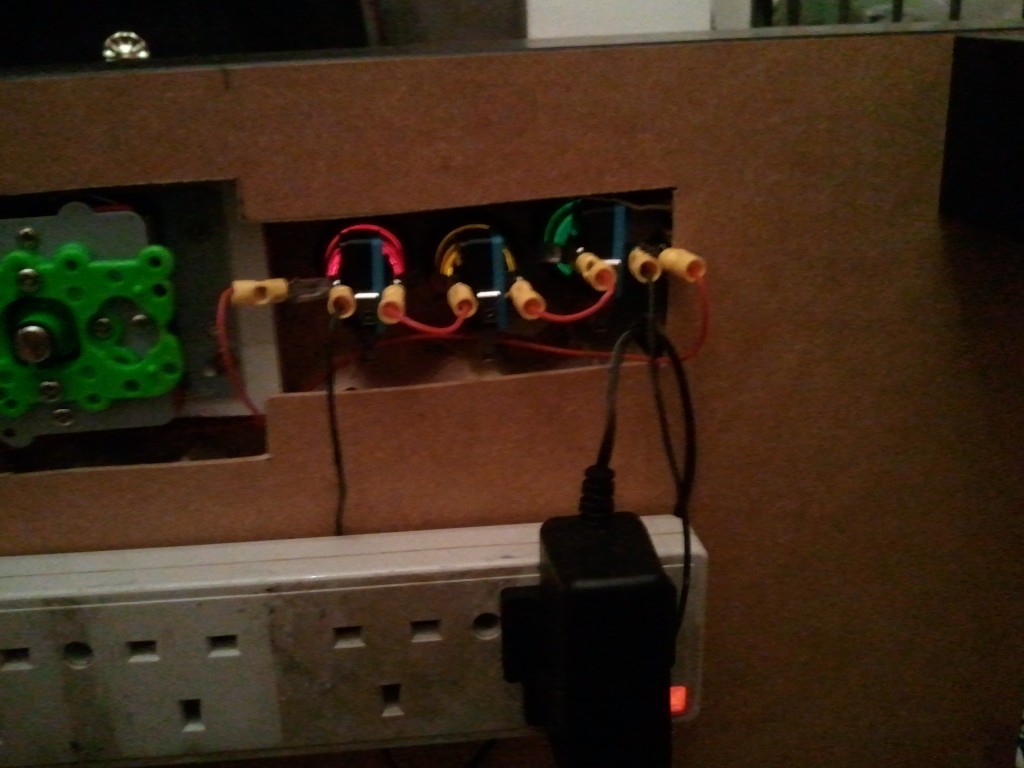
Time for some LED action, I used an old 9v mobile phone charger wired in parallel for each player to power the buttons.
Feels like Christmas:
To protect the screen I opted to cover the table in plexiglass brought from homebase. a lesson to be learnt is you can never scour it enough when cutting it down to size, the first cut show here was perfect, but my second break was not so much, and I was left with some fragments still attached which I had to jigsaw down leaving it very ugly.
Using a scrap bit of plexiglass It dawned on me just how hard this stuff is to drill, if you cut just a little too much at once it cracks, I practiced at least 12 holes before daring with the real stuff. The main take away was to take it very slow, taking a break to Hoover the waste regularly (this sometimes melts and acts a sort of glue between the drill and the sheet resulting it in cracking.)
After a week of drilling every night using the stepped drill bit I finally had the holes cut without any cracks, it was painfully slow. next time I"d probably opt for a design that has the control panel uncovered
I scrapped my wood mount for the monitor after finding some tough foam in a pound shop, this was a lot easier to mold into mounts with the stepped edges I wanted. The steps were glued at the base.
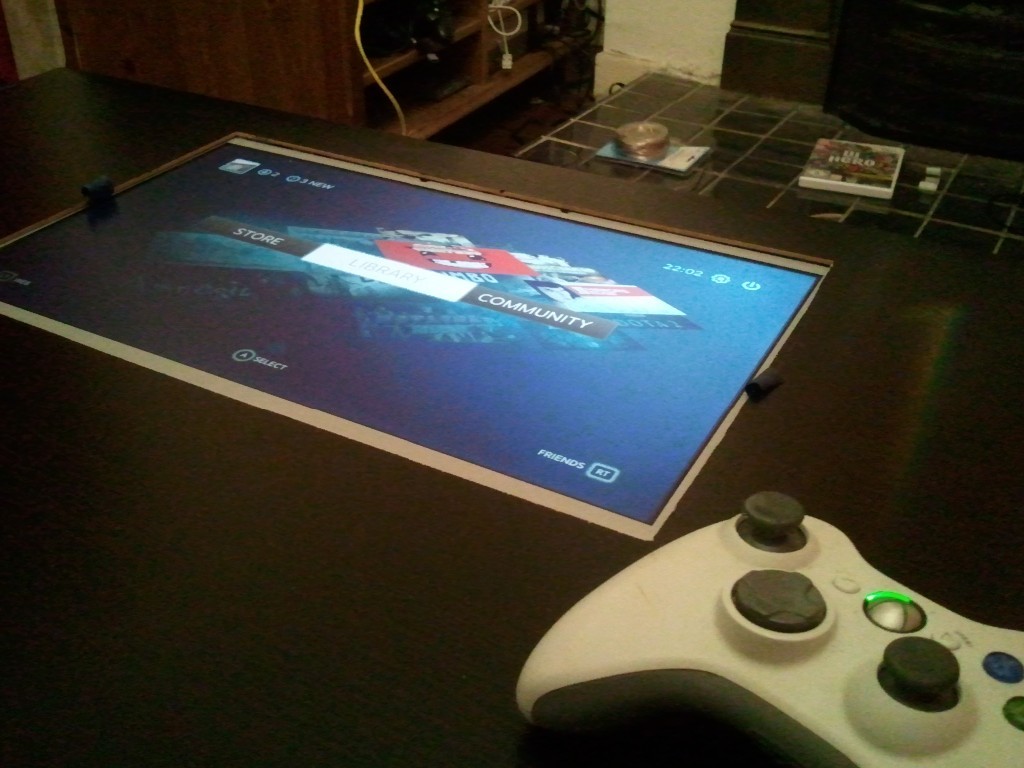
Wired up, mounted and now testing the monitor with big picture. One thing you cant see is that the monitor is mounted upside down, due to the viewing angles (I learn"t this trick at work!), the videocard rotates the image and no one is the wiser!
I"m currently wiring up the board and controls to the pi, so more pictures are soon to follow!
Here is a quick rundown of the month in which I built Air Luggage, and how I went from concept to release.
New Year"s Resolution
Seeing a post the game dev sub-reddit advertising the One game a month challenge (#1GAM) with the title "Make games not excuses" got me thinking about all the projects in 2012 I had eagerly started, but a few weeks later abandoned as the enthusiasm dropped. As a new year"s resolution I decided to put an end to this, and set myself to completing a game within a month as part of the challenge rules. This meant, no feature creep, no bloat, no "it would be awesome if it did this....".
Game Idea
I wanted the game to be as simple as possible for not only players, but for me to be able finish during the tiny timescale (I only had evenings and 4 weekends to complete it in).
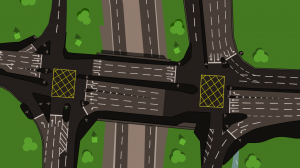
Whilst coding my previous game, in which the player had to keep traffic flowing in a city, I created a way point system for cars to follow, the way points had junctions in which the cars would randomly choose which direction to go in.
Screen-shot of Traffic (2012, Unreleased)
This was when I had the idea for a game where the player controlled which direction the traffic would flow by setting the direction of each junction. This idea was more arcade based than the puzzle game you see today, the bags would appear in random colours constantly and the player had 10 lives to direct the bags into each gate, the rate at which the bags entered would slowly increase until the player ultimately lost. Using this I wrote up the game description as below:
Concept
Using nodes from Traffic, create a new junction switching mechanism to control Y Junctions
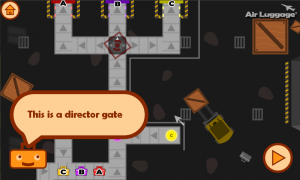
Idea is for the player to solve fast paced puzzles of getting coloured luggage to the correct gate
Luggage can be directed onto different treadmills using the switch gates, there is a central feeder system that keeps unsolved luggage in a loop.
Player has to complete each level by surviving the day with minimum of x losses.
At this point of development the games focus involved in changing the junction gates as the bags were moving rather than setting up the gates beforehand. and involved filling up a "progress meter" to complete the level.
The Problem
The trouble with the arcade style was making it fun and varied, once you"ve completed a level, the next would just look a little different, I wanted and needed puzzle solving.
However, I could not find a reasonable way to mesh both ideas together, if the player could change the orientation of the gates at any point, it would mitigate any puzzle as they could just wait until the correct bag came around and flip it accordingly to win. I needed a way to prevent this, and unfortunately this meant letter the player setting up the gates beforehand, and then watching the outcome. I hated this Idea, there was no live interaction or feedback and thus there wasn"t any room for fun game play. After a few days of sleeping on the prospect of removing the arcade element entirely it started to grow on me, and I decided to focus on making a puzzle game.
I started designing the levels and at that point it was clear I made the right decision.
Level Design
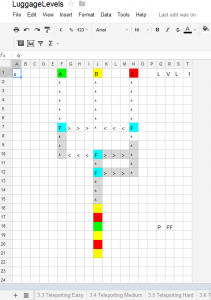
This was surprisingly fun and at the same time a chore, I opted to use a spreadsheet to design the level due to the 2D grid matching the game"s 2D grid. There was no real process involved, except trial and error, and iterating on the previous level adding new elements, Initially I had 2 ideas for junction gates, the "accurator" (count gate) and the flip flop, I designed 5 levels for each thinking later levels will combine both elements to make another 5 levels.
Google Docs Level Design
The hard part was making sure the puzzle was solvable without being too easy or obvious, often I"d relook at a level and realize how to solve it without even using half the gates (this was especially true of the accurator tiles when I decided the players could set the starting direction as well as the number of bags it"ll let though. I also made the mistake of not taking into account the timings of each conveyor, which proved to cause a lot of headaches in development when bags would try and occupy the same tile if the player did not take the "happy path".
I enjoy being able to see behind the scenes so here is the development copy of the Level doc for your viewing pleasure:
You"ll also notice some symbols near tiles (this was to help me remember how to solve my own puzzles)
Code Development
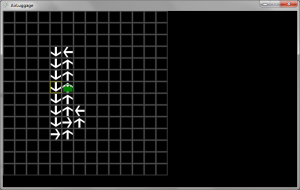
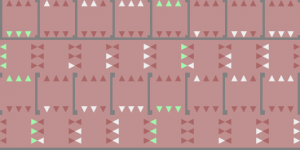
The conveyors were the main focus of the game, so the prototype had a way to place conveyor tiles in 4 directions and have a bag follow the conveyor path, there were no physics or animations at this point, the bag would jump to the next tile every second
3 Hours - Bag moving prototype
If you used the editor in the game, you"ll notice it has not changed much from this screenshot.
I continued developing this prototype adding the flip flop gate and count gate, and tested each of my levels in the level doc, to which I noticed quite a few were unsolvable, or had overlapping bags.
(Sadly I don"t have any screen shots from this point)
Getting physical
One thing that was sitting at the back of my mind was how to make the bags move along the conveyor, I could moved them linearly across tiles, however I was stuck on what happened when 2 bags tried to occupy the same tile, which bag had priority, did they overlap, did they collide?
I knew a way to solve all my problems with 1 stone, but having never properly implementing a 3rd party physics engine before I was very hesitant given my timescale, if it wouldn"t play nice. I opted for farseer, due to it being the de facto for XNA.
Many hours of setting the collision boxes, masses and friction were needed to try and get more than 1 bag around 90" corners without getting stuck, but boy did it look good.
Farseer rotating and colliding the bags
There"s actually a lot more going on than first appearances to get the effect the bag is travelling on the conveyor, and there is little to no information on the web about how to achieve such movement.
Each bag has 4 points at the edges that are separately checked to see which conveyor they are on, and which direction the conveyor is moving, this allows the subtle rotation of the bag as it changes direction, the direction each point should be moving is stored as a unit vector, and the following code is used to work out how much impulse to add to the angle (all the further rotations and movement is handled by farseer)
float forceLength = Force.Length(); //Force = Direction the corner should be moving in
Vector2 curVel = AttachedBody.LinearVelocity;
Force /= BagCollisonBoxes[0].Count; // Divide the direction force scale by the number of points we re checking (this case it"s 4) so its 25 % influence over the bags direction
float power = Vector2.Dot(curVel, Force) / (forceLength); // Work out how much impulse is needed to make the bag move in this direction (this is already scaled by 25%)
if (power < forceLength)//apply if we"re not at 100% speed
{
Force *= (forceLength - Math.Max(power, 0)); //Difference between our desired vel and current vel
Force *= AttachedBody.Mass;
AttachedBody.ApplyLinearImpulse(ref Force, ref worldPos); //apply force directly at the point
}
The force values and max speed were fine tuned to match roughly the conveyor animation speed, the world has no gravity which completes the top-down look.
Another problem I encountered was that farseer objects tend to bump off of joins in the solid tiles, so if a bag was sliding along the conveyor wall, between each tile it"ll bounce and rotate off the wall as if it had a dent in the wall. I had to write a collision hull generator that looked across tiles to create a single large solid plane for the bags to collide, each time a level is played this is created on the fly:
As you can see here, the green collision boxes have been simplified if 2 tiles are adjacent to each other. The white arrow shows where the simplification process hasn"t been applied (I didn"t take into account vertical joins as they"d always be a block to the left of this tile to join to in a real level). The hull generation process also has the added benefit of reducing the number of collision meshes the physics engine has to process making it a lot faster. Each tile has it"s own meta-data on what collision edges it has and a simple formula marches though the tiles drawing connected boxes.
The game play code was pretty much complete once the physics engine was in, was just a case of telling each bag a different direction to travel in for the flipflop and other special tiles.
Artwork
I am not an artist, in fact I"m hopeless at art, which is a big problem when making games by yourself. Lucky I get around this by using vector art, which works in a very different way to pixel art (Photoshop etc), every texture in the game is made using lines. Vectors means you can zoom in indefinitely and never get pixel blur, which gives the game a crisp look, vectors are also adjustable, allowing the assets to be tweaked over and over until it looks decent. I also rigorously used color theory, keeping the backgrounds dark and low contrast, and making game objects colourful with dark pin lines to separate them away.
The Menu color pallets where created using http://colorschemedesigner.com/ which use color theory to pick complementing colors.
The tiles were just made with a big tile sheet to keep things simple, I started exploring overlays later in development to do the walls for each tile etc (this is the only tile with fixed collision edges)
January ends
I"m so close to finishing, yet I could not release the game in time for the January deadline, I was still missing the last 5 levels, and knew I needed another tile type to keep things interesting. I had a huge holiday booked in February and in the week I was home I did not have time to do the finishing touches.
March
The project looked to sit on the shelf for all eternity, I still had not come up with a new tile type (How many directions can the bags move) nor had any new level ideas. Eventually I forced myself to sit down and code something, this was the Teleport tile, which allowed matching bags to appear in another location in the level. With another week of work and 2 weekends the game was finally ready to be released.
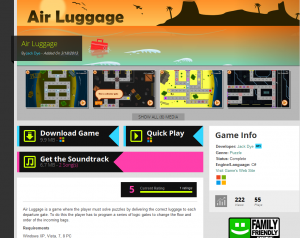
At the time of writing it"s got 200 views and 55 plays on Game Jolt and a 5/5 rating, which is about average given the time on game jolt. For me it"s a personal success being able to finally release a full game, nothing quite beats the feeling of shipping something.
Physics based Platformer for PC and Windows Phone 7 Game design by Jack Dye, developed by Silicon foundry (Matthew Harris, David Hart, David Armstrong, William Dann, Ashley Eglin, Jack Dye)
Design The basic design was formed in a response to a brief set by aim higher, which was to create a short game to inspire prospective students the benefits of university education and debunk some urban myths about the type of people who go to university.
The game begins with the player as a ball on a starting platform, the player must execute a series of jumps to bypass obstacles and land on green safe platforms, the objective of the game is to make it through the level without dying.
The player loses if the ball lands on spikes, lava, or rolls to a stop without landing on a green platform.
Level Designs To make the game more interesting 8 Powerups were designed to enhance gameplay:
Subject
PowerUp Effect
Chemistry
Sticky Ball (sticks to walls and ceilings)
Physics
Adds an Aiming guide
Maths
Calculates Reflections on wall collisions
Geography
Displays a Mini Map of off-screen platforms
Art
Adds partial effects to balls motion
Re
Restores the ball from X turns ago
History
Shows Previous shot"s guide
Biology
X% chance of bird saving ball when falling
Music
Subwoofer blast from below gives the ball a "double jump"
Along the way when the player collected powerups the player will be shown information about continuing the subject in higher education, a combination of powerups would adjust the possible degrees that can be taken with the a levels and in turn give different career paths.
The powerups are stackable so collecting more of a powerup increases its effectiveness.
Game: The game was developed over a month with a university set deadline which we had to meet. Our team was split up into 3 programmers, 1 graphics artist, 1 tool programmer and a documenter.
At the end of development, we had a fully functioning game with 5 levels, 5 powerups, 6 platform types and a level editor.
I coded most of the physics, ball, powerup and platform behaviors, and created 3 of the levels.
Level Editor The level editor is fully functioning, with a test mode to directly start the game in the current level, and is used to place platforms and powerups, and change the level size and background allowing quick deployment of a large number of varying levels
Using a Vicon optical motion capture suite (which was available for use in my university) I wanted to take motion capture beyond the movies, and implement a fully interactive gaming experience in which the player is the controller, This allows 6 Degrees of freedom for the player to move in, so leaning around corners, ducking, view freedom from your gun and blind firing, are realised and more immersive than a traditional keyboard and mouse setup could ever be.
more
The Vicon suite was one of my primary reasons for choosing the University Of Hull, and I am beyond thrilled to be able to use it for my undergraduate dissertation.
The initial specification I drew up over the summer was for the player to wear a Head mounted LCD display, which allows 3D stereoscopic viewing of my virtual environment, attached to the HMD and gun are fiducial markers that enable optical tracking, the player aims with the toy gun (Which is modified with a wireless mouse) to shoot down virtual enemies.
Game engine progress
My game engine has been created from scratch in OpenGL and C++.
It Currently features:
3D Stereoscopic rendering
First person tracking support (for HMD's)
Paralax Motion Head tracking support (for monitors/projectors)
GLSL shader support, with bump mapping and per fragment lighting
Skybox shader
OBJ model loader and texture support
Collision detection for the world, AI and gun (Ray-Sphere, AABB, OBB)
AI enemies which seek out the player avoiding world objects.
TCP communication with a Vicon motion capture suite
Configurable files for tracking data transformations
It has been particular intensive in matrices with converting from the tracking coordinate system to OpenGL's co-ordinate system, I learnt openGL's shader pipeline to enable shaders that I created from my
to work within the engine. Wrote an AI collision avoidance and steering algorithm based on vector maths.
Tools used
Visual Studio C++
FreeGlut
GLSL
Wavefront OBJ
Render Monkey - Shader design
Blender - Gun model design & model cleanup/UV mapping
Google Sketchup - Level design
Sculptris - Charater models
Photoshop - General texturing
Vicon Real time emulator
Screenshots
These screenshots are now outdated (See below!)
Clockwise: Spectator camera view of level, First person View, 'Flyray' flying enemy with bumpmapping
Close up of the players area in which they have to defend
10/03/11 Update
Rooftop level progress (Google Sketchup)
Google sketchup makes an interesting tool for level design, with the use of a 3rd party OBJ explorer the CAD tool could export models directly into my game, The texture mapping and dynamic geometry features of sketchup pretty much sold it to me as my weapon of choice to create my 3D rooftop.
20/03/2011 Update
Level is fully complete, Textures were aquired online, and bump maps were created using Nivida's Normal map plugin for photoshop. The GLM model class was modified to support 2 textures and a bumpmaped phong shader, with a fallback shader if there is no normal map for a texture. Normal maps are defined in the models .mtl file.
30/03/2011 Update
The HMD idea was scrapped due to the age of the hardware, mainly the LCD screens offered poor contrast.
Instead the game now runs on a 5x3m 3D Rear projection wall in the Vicon suite, and makes use of paralax motion tracking (Inspired from:
). It makes use of 3D ontop of the paralax to give an incredible effect of the world ajoining through the screen.
Video showing the paralax motion in action, notice how the effect is lost when tracking is lost in the 5th seccond. Although this is recoreded in 2D, the mouse seems to float far infront of the world purely by the paralax illusion. In 3D this effect is hightened, and the gun appears to float far infront of the screen as if the user is holding it.